
What is Arrangement View?
Arrangement View is a customizable, digital tool to help guide your arrangement meetings. Think of it as a simplified version of the case that can be shared with the family.
To use it to the fullest, we recommend you:
- Customize it to match your own arrangement process
- Cast it to a screen in the meeting room
- Use it to guide your conversation with the family
Getting started
To open Arrangement View, go to the case and click Present arrangement from the header.


Show or hide the left menu at any time using the arrow.

Arrangement View is made up of two sections: Arrangements and Service agreement.
Within each section are pages of questions or prompts for the family.

Continue reading for a detailed look at each page.
When you're ready to begin the arrangement meeting, click Start.

Arrangements
The first section, Arrangements, is designed to help you gather information about the decedent and their funeral wishes.
Decedent's life
The Decedent's life section asks for vitals, such as name, gender, race, and more.
Their name will already be populated but can be updated here if needed.
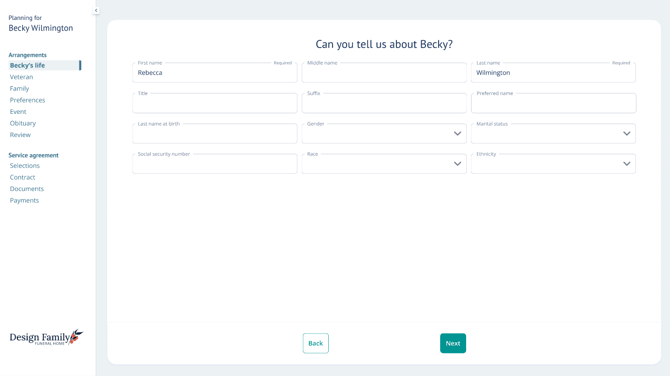
Any information already in Passare will populate here, and vice versa.
Use the Next button to move through Arrangement View, filling it out as you go.

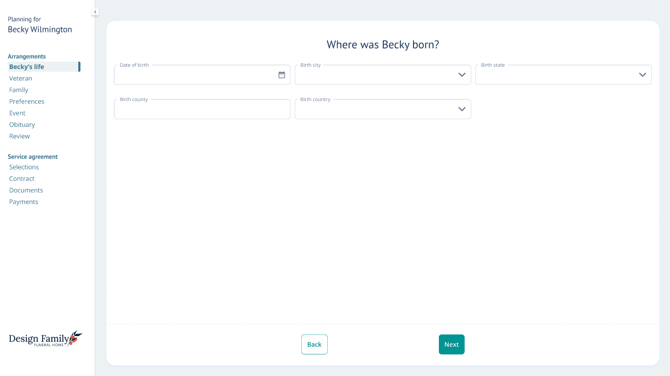
The second page of this section asks for place of birth details.
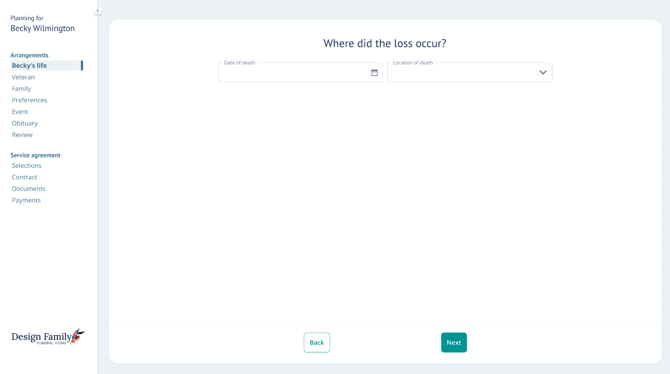
The next page asks for the date and place of death.
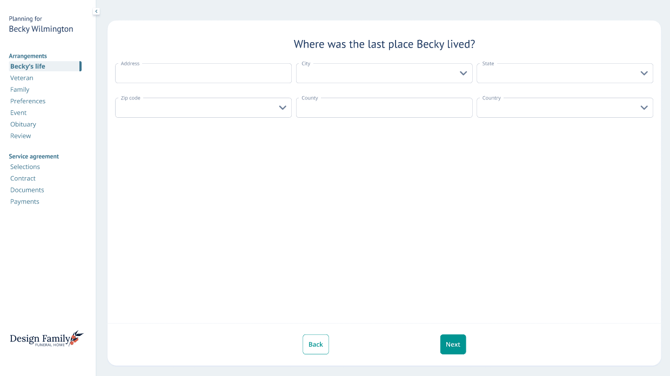
Next, fill out the decedent's address.
And finally, add in their education and employment.

Click Next to view the Veteran pages.
Veteran
In the Veteran section, you can fill out details about their military service.
First, select Yes or No to indicate if they were a veteran.
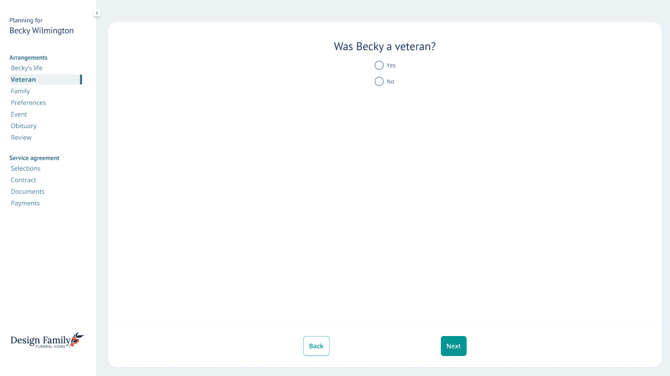
If you select no, you will be routed to the Family section.
If you select yes, you will be prompted to enter additional details, such as branch of service, tour(s) of duty, and discharge information.
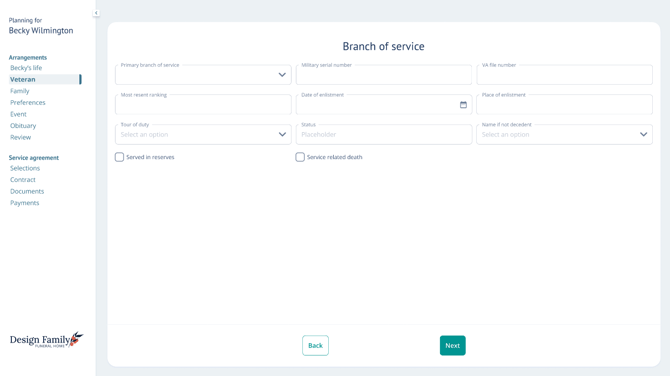
Use the Add button to enter details about a tour of duty.

Finally, note their date and place of discharge, as well as any benefits awarded.

Family
On the Family page, you can add family & friends, just like in Passare.
Click Add and fill out the person's name, email, relationship, and role.
.gif?width=670&height=328&name=chrome-capture-2026-06-16%20(1).gif)
If needed, you can invite family members to Planning Center by clicking the ellipsis and Invite.
You can also edit or delete the contact from this menu.

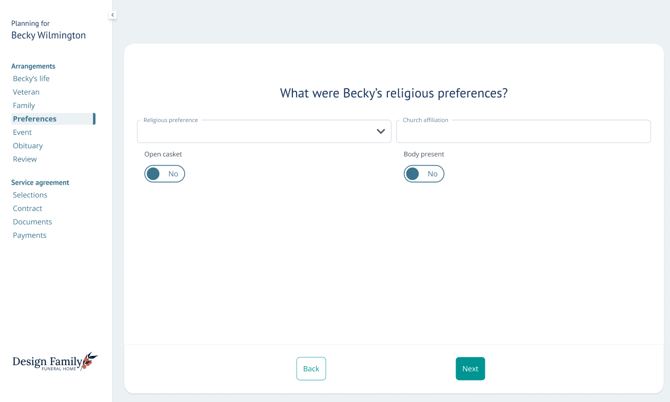
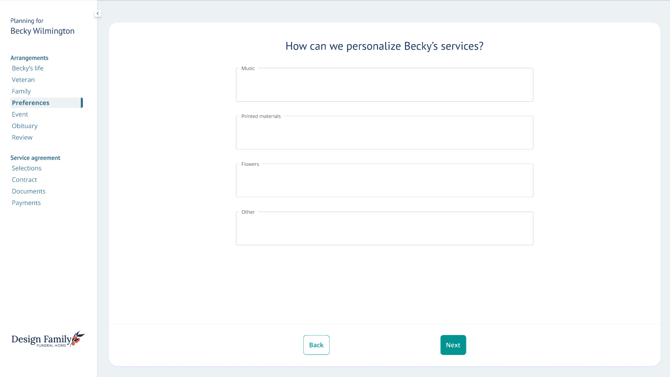
Preferences
Next, you will answer preference questions based on the family's wishes.
For example, you can note if they prefer burial or cremation.
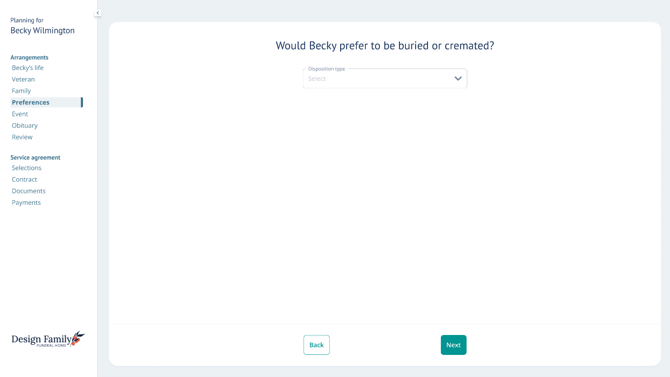
You can also add religious preferences and brainstorm ways to personalize services.
Event
Schedule services from the Event page.
Click Add and fill out event details like service type, date, and time.
.gif?width=670&height=325&name=chrome-capture-2026-06-16%20(2).gif)
Obituary
You can craft the obituary in one of three ways:
- Free type directly into the text box
- Use a template
- Use the AI Obituary Writer
To work from an obituary template, use the dropdown to select a template option.
Clicking a template option will populate it in the textbox, where you can continue to edit if needed.

To use the AI Obituary Writer, select AI Assistant.
Choose a tone from the dropdown and type a prompt for the AI generator. Then click the arrow.
Once the obituary is generated, you can make edits within the textbox if needed.
.gif?width=670&height=328&name=chrome-capture-2026-06-16%20(3).gif)
Review
Next, review the event and contact details with the family before moving on.

Once they have confirmed the details are correct, click Next.
Service agreement
The Service agreement section is where you will build a contract and finalize decisions with the family.
Selections
Show families your merchandise from the Selections page. You can scroll to browse items within a category, and switch categories at the top.
To add an item to the contract, click Add and adjust the quantity if needed.
.gif?width=670&height=376&name=chrome-capture-2026-06-25%20(2).gif)
Learn how to [set up your Selections catalog].
Contract
On the Contract page, add items to the contract that are not already selected from Selections.
To do this, click Add and either expand categories or search for specific items.
Then click on the item to add it to the contract.
.gif?width=670&height=326&name=chrome-capture-2026-06-16%20(4).gif)
Click Next to view the full contract document.
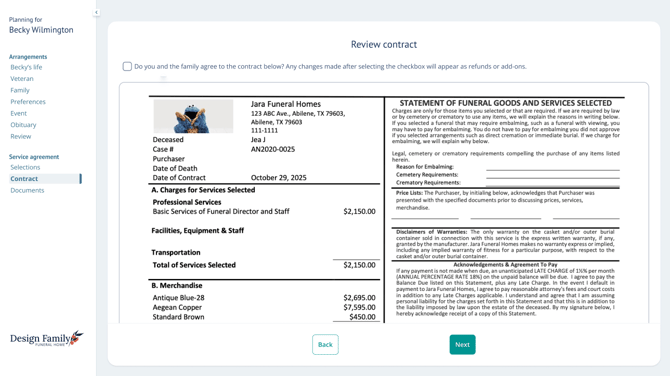
Want a different contract template to show here? Learn how to [select another one].
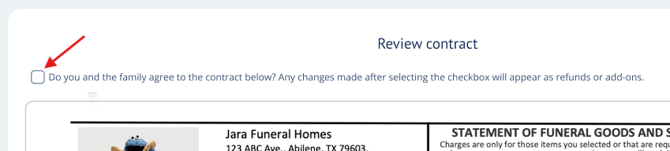
Depending on your organization's settings, you may see a signing checkbox at the top.
When clicked, this will sign the Goods & Services page of the case.
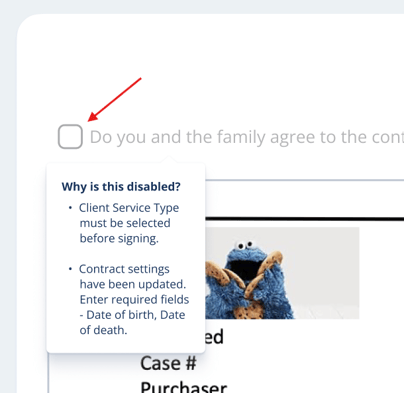
If the signing checkbox is disabled, hover over the text to see what information is missing.
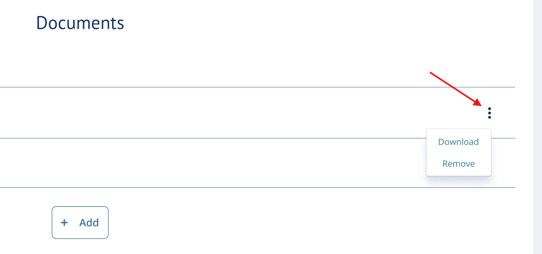
Documents
Next, select which documents the family needs from your document library.
Click Add and either expand categories or search for a specific document.
Then click the document to add to the list.

To download or remove a document, click the ellipsis and select the correct action.
Payments
From the Payments page, you can collect payment for services by scanning the QR code.
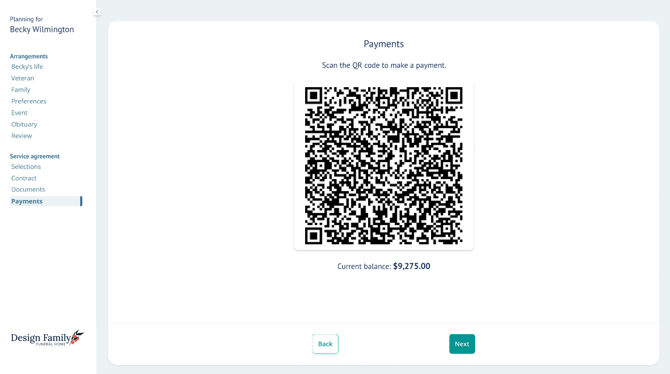
You must be set up with Deluxe, our payment processing partner, to accept payments in Arrangement View. Learn how to register with Deluxe.
Scanning the code will direct families to a form where they can choose to pay via bank draft or credit card.
To use bank draft, select Bank draft under Payment options and fill out the information.

To use credit card, select Credit card and fill out necessary information.

Once the payment is processed, it will be reflected in the Arrangement View balance.

After payments, click Next to end on the original landing page.
Need more information?
- Signing the Goods & Services
- Process card and ACH payments with Deluxe Merchant Services
- Register with Deluxe Merchant Services
Need Help? Email us at support@passare.com or call 1-800-692-5111.