
Jump ahead to
Calendar overview
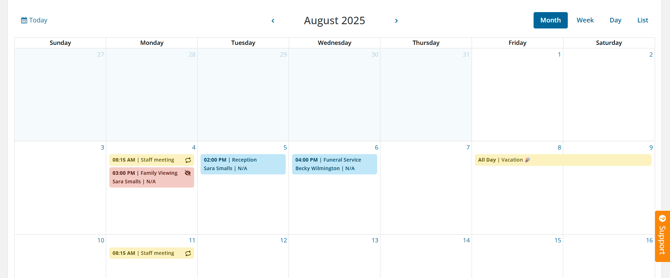
To view your organization's Calendar, select Events from the navigation.

If you have events added in Passare, you will see them in colored blocks.
By default, events appear this way:
- Non-case events are yellow
- Private case events are red
- Public case events are blue
Learn how to customize event colors for your organization.
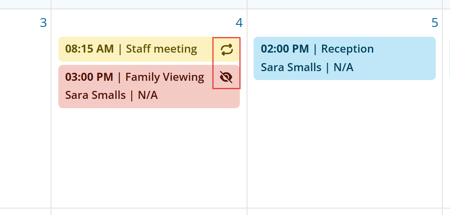
Recurring events have a repeat icon, and private events have the eye-slash icon.
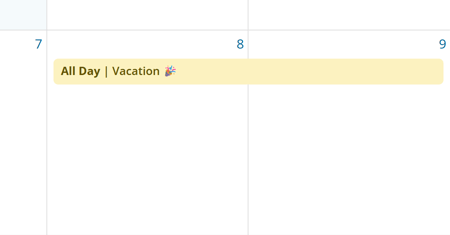
For events that span several days, the color block will stretch accordingly.
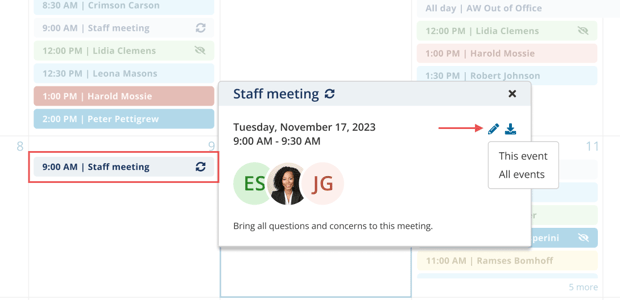
View event details at a glance by clicking on the event.
The event popover will display details such as decedent information, location, date, participants, notes, and associated events.
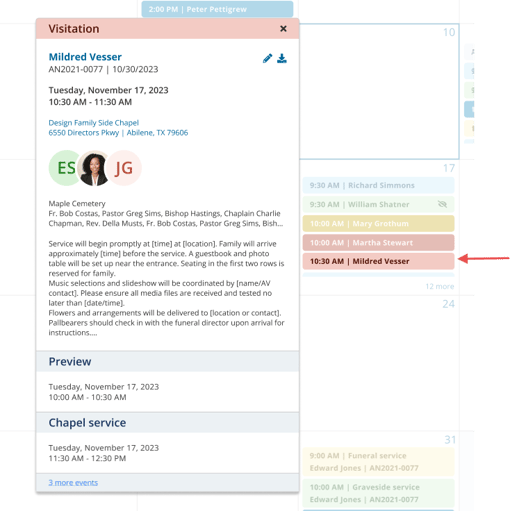
Click on the gray event header in the popover to view other events for that case.
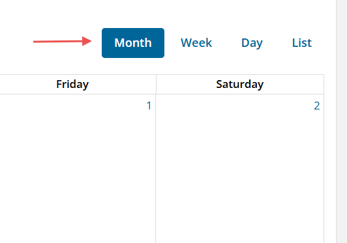
To switch your view, use the month, week, day, or list buttons in the top-right corner.
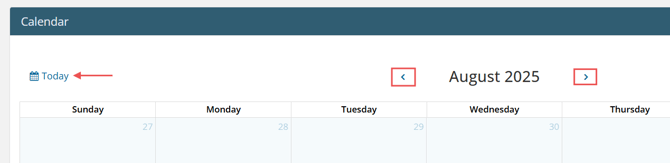
Use the arrows on either side of the header to view other months, if needed.
Then click Today in the top-left corner to jump back to today's date.
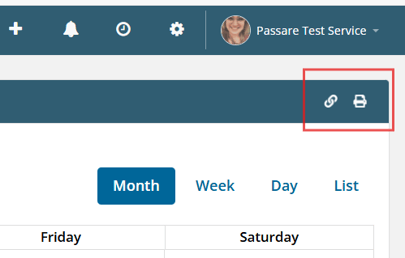
To connect Passare's Calendar to your personal calendar (like iCal, Google, etc.), click the link icon in the top-right corner.
You can also print your calendar in a table format using the printer icon.
Learn more about connecting your calendar.
Create an event
You can add events directly to the Calendar page or within a case.
To create an event from the Calendar, double-click the day you'd like to add it to.

To add events from the case, go to the Funeral Options page.
Under the Add Event section, select the type of event from the dropdown.
Then choose a date, time, and click Add Event. 
For help customizing your event types, reach out to Passare Support.
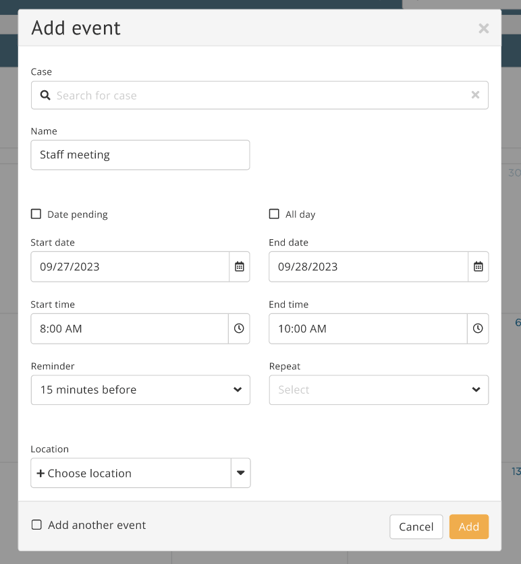
Next, you'll see the Event modal. Continue reading to learn about each setting.
Event settings
Case vs. non-case events
For case events (i.e. funeral service), select a case and the Service type.
The Private event box will be checked if the event is set up as private, but you can check or uncheck this option for any service.

For non-case events (i.e. staff meetings, vacations, etc.), skip the first field and name the event.
Non-case events can only be created from the Calendar page.
Event timing
Add the date and time, or mark if it's a pending or all day event.

Reminders
To be reminded of the event, select a reminder time.
You can receive event reminders by email, text, or in-app alerts.

Learn how to configure your own notifications.
Repeat
Non-case events can repeat.
If repeating, select the frequency: daily, weekly, monthly, or yearly.

Then, specify when and how often it repeats.

🔁 Daily events: Event occurs every 1 day, 2 days, etc. at the same time.
Example: Every day at 8am or Every other day at 10am.
🔁 Weekly events: Event occurs every 1 week, 2 weeks, etc. or multiple times a week.
Example: Every week on Mondays and Thursdays.
🔁 Monthly events: Event occurs every 1 month, 2 months, etc. on specific date or certain week/day.
Example: Every month on the 25th or Every month on the 2nd Monday.
🔁 Yearly events: Event occurs annually on a specific date or certain week/day.
Example: Every October 25th or Every 2nd Monday of October each year.
Preparation due
If you need the body ready a certain time before service, select a Preparation Due date.

Once the event is created, a corresponding Preparation Due date will be added to the Care Center.

Location & service providers
For case events, you can add the event location and service providers.
Select multiple service providers or delete them by clicking x next to their name.
For non-case events, the location dropdown will show visitation rooms added to your branch.
Learn how to add visitation rooms to a branch.
Participants
Use the Participants field to select which user(s) or role(s) will attend the event.
In the dropdown, you can also see if someone is unavailable at that time.
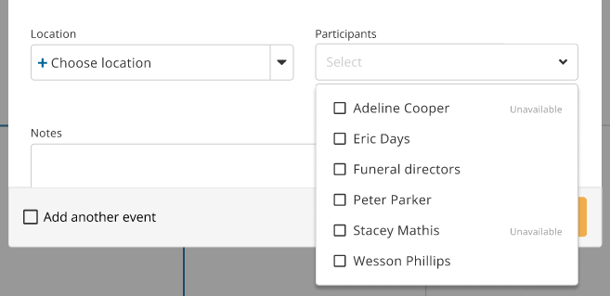
Participants will be notified when they are added or removed from an event, or if their event is updated.
Add multiple events
Check Add another event to save your current event and create a new one.
Once you are done adding events, uncheck this box before saving your last event.
Once all settings are configured, click Add.
Manage your Calendar
To edit an event, click the event and select the pencil icon.
If it's a recurring event, choose to either edit this event or all events.
Make necessary changes and save.
To delete the event, click Delete from the bottom left of the modal.
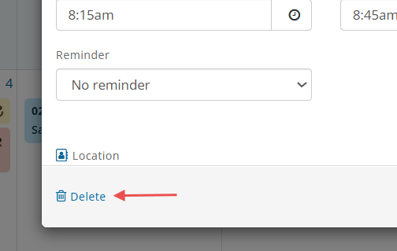
Confirm with the Delete button again.

Need more information?
Need Help? Email us at support@passare.com or call 1-800-692-5111.