Create and run checklist reports
Run reports on checklists that are essential to your business.
Build report
To get started, go to Reports > User reports.

Select Add New Report.

Name your report and make any relevant selections in the Basic Filters section.

Under Build Your Report, choose Checklist Tasks from the Rows show results for dropdown.

Expand sections or use the search to find the columns for your report.
Drag and drop the column's tag to the Build & Organize Report Columns section.

You can also drag an entire section to bring over multiple columns.

Your report will show columns in this order from left to right. To rearrange them, drag any title to a new spot in the list.

To delete a column, click the x next to the title.

Once your columns are configured, choose if you'd like the report to be grouped and sorted.
⚙️ First grouping will separate data into their own sections of the report.
Example: you may want to group your data by branch.
⚙️ Second grouping creates a subset of data within the first group.
Example: you may want to group checklists together for each branch.
⚙️ Sorting determines the order of data within a group.
Example: you may want to see your cases in order of date of death.

In order to group and sort data, those columns must be included in the report.
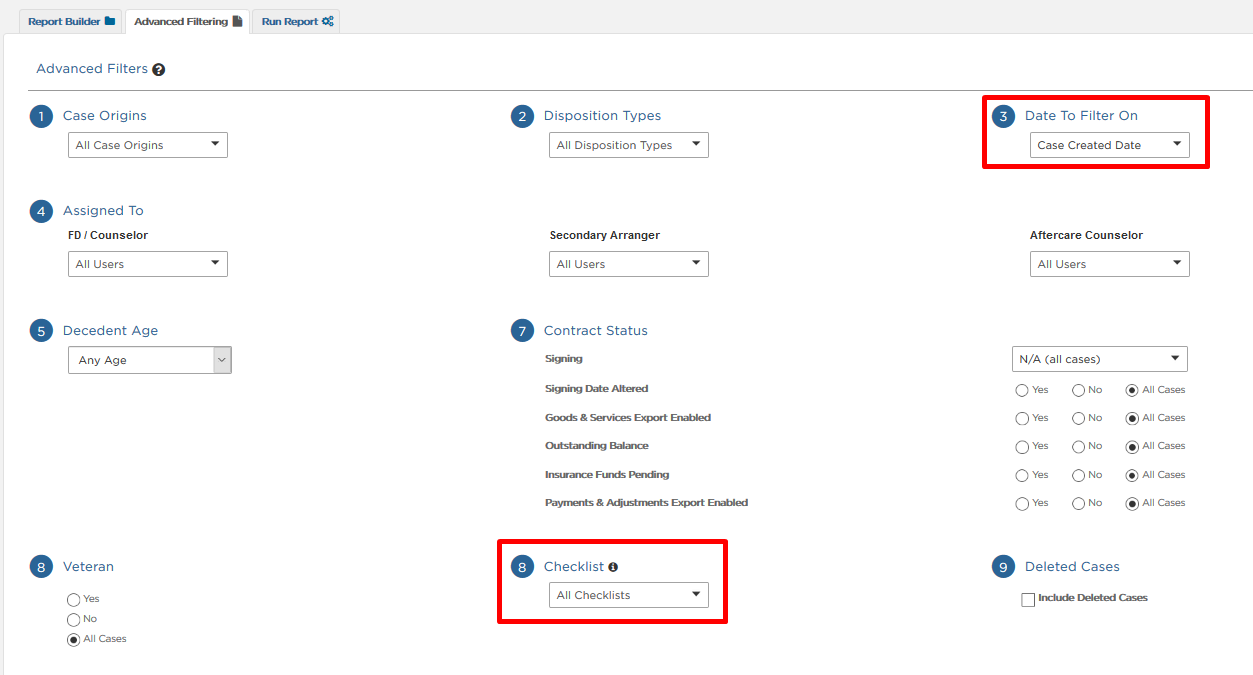
At the top of the page, select Advanced Filtering tab.
Be sure to select the Date to Filter On. This will default to Case Created Date unless you choose otherwise.
For Checklist, make sure to select the name of the checklist you'd like to see in your report.

Make additional selections on the page, if needed.
Run report
Next, go to the Run Report tab at the top of the page. Choose your Report Format and Date Range.

Then click Save Without Running.

Select Save & Run at the top right of your page. This will send the report to the Download Center unless you specified it to be emailed.

Download report
To download, go to Reports > Download Center.

Your new report will be listed at the top in the Ready for Download tab. If you are running a larger report, it may take a few minutes to move from the In-Queue tab to Ready for Download.

Once your report is ready, click Download. Your report will download wherever your computer stores its downloads.

Need more information?
Need help? Email us at support@passare.com or call 1-800-692-5111.
