
Jump ahead to
How to create a case
To create a case, hover over the Add icon in your top navigation.
Select Case and the case type you would like to create.

The case types available are:
- At-need
- Pre-need
- Imminent-need
- Trade case
- Pet case
- Cash sale
Missing some case types? It may be because they are not enabled in your account.
To enable these, contact Passare Support at support@passare.com or 1-800-692-5111.
At-need
Use At-need to log important details and plan services for decedents in your care.
With At-need cases, you can:
- Track biographical information (such as vitals and veteran info)
- Record family members & and their role in planning
- Schedule service and disposition information
- Write the obituary
- Build a contract & receive payments
All information added to a case can be used to pre-populate forms, generate business reports, and more.

Learn more about at-needs here.
Pre-need
Use Pre-need to store data about someone with a pre-need contract.
With Pre-need cases, you can:
- Track basic information (such as contact and veteran info)
- Record family members & their role in planning
- Log obituary, service, and final disposition wishes
- View policy information (through the FDLIC integration only)
- Build a contract

We suggest that you do not sign the Goods & Services for pre-need cases. If you sign, the information will appear on your accounting reports.
When it's time, convert to at-need in the case information sidebar.

Learn more about pre-needs here.
Imminent-need
Use Imminent-need to record information on those in hospice or near passing.
With Imminent-need cases you can track the same details as an At-need, excluding death details.

You may find it useful to create Reminders for follow-up and add Case tags for reporting.
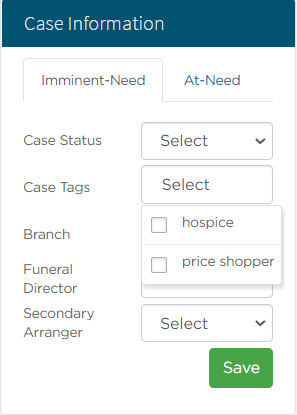
When it's time, convert the case to At-need on the case information sidebar.

Learn more about imminent-needs here.
Trade case
Create Trade cases to keep track of trade work, including embalming, removals, and cremations.
With Trade cases, you can:
- Record the business you are doing trade work for
- Add case basics like vitals and disposition
- Build out a contract & receive payments
- Print off an invoice for another funeral home

Learn more about trade cases here.
Pet Case
Use Pet cases to log death and cremation information for pets.
With Pet cases, you can:
- Log pet basics like name, breed, and weight
- Record owner name & contact info
- Record veterinarian clinic associated with the pet
- Build a contract & receive payments
- Print off an invoice for clinics or owners

Learn more about pet cases here.
Cash sale
Use Cash sales to track ancillary sales, such as additional death certificates or merchandise.
With a Cash sale, you can:
- Associate it to a decedent's case
- Log the buyer's contact information
- Build a contract, receive payment & generate a receipt

Learn more about cash sales here.
Need more information?
Need Help? Email us at support@passare.com or call 1-800-692-5111!