
Jump to:
Vital Statistics
To start, log in to our staging environment with your temporary username and password.
Once logged in, select the Case Listing tab.
Here you'll see the cases that are being transferred.
Select the name of a decedent to open the case.
You should see the case menu at the top of the screen. If not, click the arrow to expand the menu.
Click Vital Statistics.
Scroll through the page to verify that the information being transferred is accurate.
On this page, the following fields will transfer:
- Decedent name
- SSN
- Decedent address
- Gender
- Marital Status
- Level of education*
- Occupation
- Date of birth
- Place of birth
- Date of death
- Place of death
* Keep in mind, data in Passare's dropdowns must match between Passare and your old system for that data to transfer successfully.
Next, verify that the Case Information sidebar displays correct information.
Fields that transfer here include:
- Branch/Location
- Case Identifier
- Case Type
- Created Date
- Case Status
- Funeral Director
- Client Service Type (i.e., Traditional Burial, Direct Cremation, etc.)

Family & Friends
Once you review the Vital Statistics, scroll back to the top of the page and select Family & Friends from the case menu. 
Verify the correct Family & Friends are in the case.
Select the name to view more details.
On this page, the following fields will transfer:
- Acquaintance name
- Common Roles (i.e., Next of Kin, Informant, etc.)
- Relationship
- Email Address
- Home/Work/Mobile Phone
- Deceased (Y/N)
- Date and Place of Death
- Place of Burial
Funeral Options
Select Funeral Options in the top navigation.

This will show the service details for the decedent.
Fields that transfer are:
- Event Type
- Event Date, Start/End Time
- Venue Name, Address Lines 1 and 2, City, State, Zip
- Attendance (private or public)
- Event Notes

Click the service name for more details.
Obituary
Click the Obituary page in the navigation bar.
Obituary text only will transfer to this page.
Disposition
Next, go to the Disposition page.
Verify that the disposition details of this case are accurate.
Fields that will transfer include:
- Disposition Type
- Disposition Date
- Disposition Notes
- Disposition Address
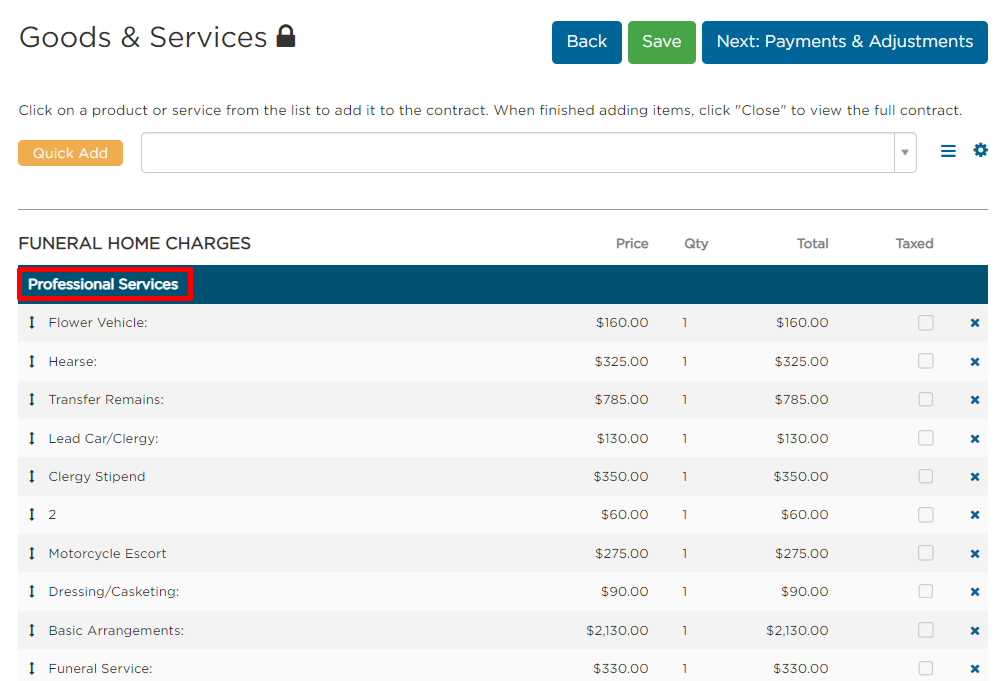
Goods & Services
Click Goods & Services under the case menu.
All contract items will be categorized as Professional Services. Verify that everything looks correct.
Fields that transfer are:
- Item Title
- Item Quantity
- Item Unit Price
- Item Total Price
- Signed Date
- Invoice Exported Date
- Payments Added to Accounting Date
To categorize contract items manually, see Adjust Goods & Services for Transferred Cases.
Payments & Adjustments
Click Payments & Adjustments.
All Payments will come over as an Adjustment transaction. Be sure remaining balances are correct.
Fields included in transfer are:
- Payment Date
- Payment Type (Adjustment)
- Payment Amount
- Payment Notes

If you don't already have one, contact your Implementation Manager about pulling your Accounts Receivable report. This will show if any cases have incorrect balances.
Then, return to the Case Listing page by selecting Dashboard at the top of the screen.
From here, you can continue reviewing other cases.
Once you're satisfied with the content of the data, you'll need to complete the approval form.
When we receive the completed form, we'll work with you to get your finalized data uploaded to your active Passare account.
Curious what data transfers? This article details which data points are supported to transfer to Passare.
Need help? Email us at support@passare.com or call (800) 692-5111.