
Jump to:
Common use cases for multiple contracts for at‑need cases:
-
Multiple payers & third‑party assistance on the same case - When more than one person, organization, or agency is paying, you can create a separate contract for each payer.
-
Keep who owes what crystal clear
-
Keep agency‑funded items on one contract and family‑funded items on another
-
Make it easier to collect, track, and report on each payer’s portion
-
-
Monuments, markers, cash sales, cash advances, and last‑minute additions - When a family adds monuments, markers, or other products—or buys extra keepsakes and “one last thing” after the main contract is signed—you can put those on their own contract.
-
Keep the main funeral service contract focused on services
-
Add new items on a separate contract without reopening the original
-
Track these add‑ons with their own exports, signatures, and payment history
-
Using multiple contracts means your contracts, exports, and reports more accurately reflect what actually happened—who signed, what was sold, and how each part was paid. These scenarios help you manage complex arrangements with clarity, accuracy, and flexibility—eliminating the need for workarounds.
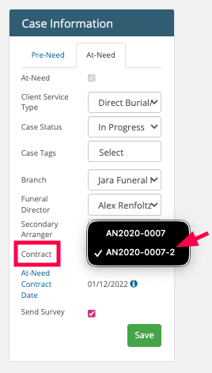
It’s helpful to know which fields apply to the full case and which apply to each contract.
Case-level fields are shared across all contracts:
- Branch
- Case status
- Case tags
- Client service type
- Funeral director
- Secondary arranger
- Contract disclosures
Contract-level fields are unique to each contract:
- Contract date
- Signing dates
- Contract terms
- At-need conversion date
- Send survey checkbox
- Primary purchaser
- Co-purchaser
- Due by date
Using multiple contracts
Once the feature is enabled, navigate to an existing Case
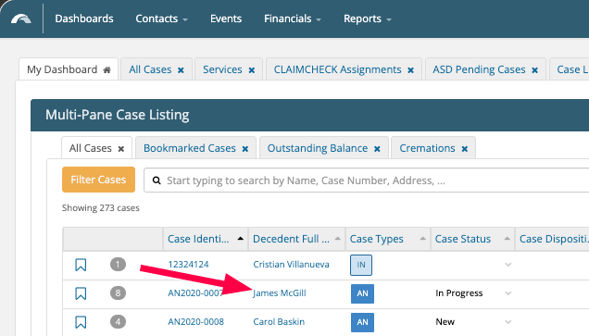
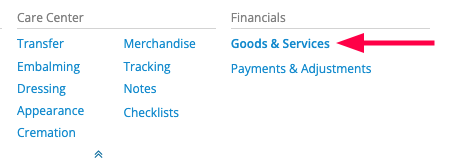
Navigate to the Goods and Services page
Copy preneed items to a contract
You can copy items from a preneed contract into an at-need contract
- Navigate to the at-need contract tab you want to copy items into.
- Select Copy Preneed Contract.
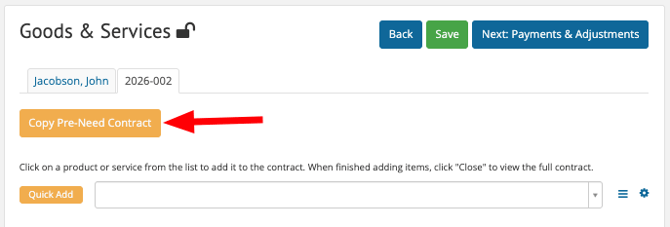
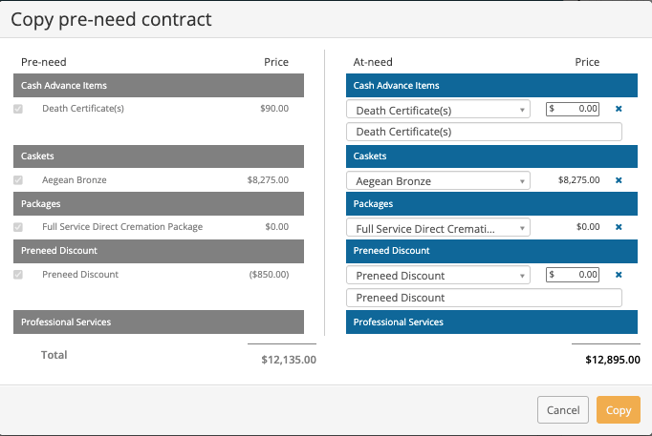
- Map the preneed items to the at-need contract > Click Copy.
🔒 Each pre-need contract can only be copied once. After copying, that pre-need contract is locked from being copied again. However, you can still copy items from the pre-need contract to other at-need contracts manually.
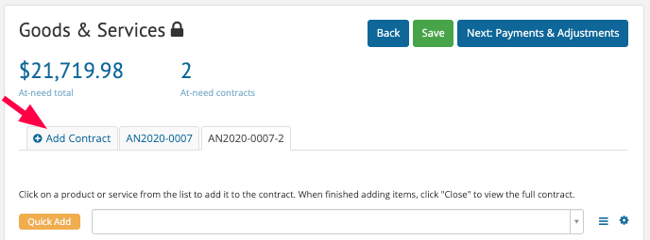
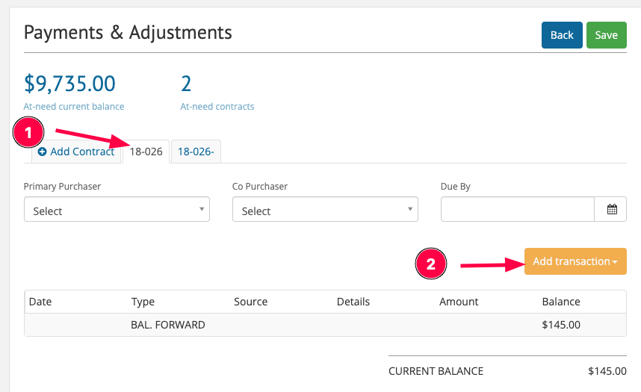
Add contracts
-
At the top of the Goods & Services page, you’ll see tabs for each contract
-
To add a new contract, click Add Contract.
Configure Each Contract
-
Each contract is automatically named based on the case identifier.
-
You can assign a unique Primary Purchaser, Co-Purchaser, and Due By date for each contract.
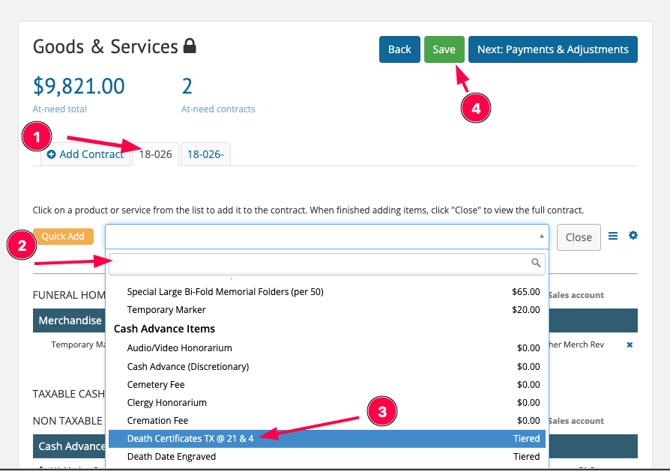
Add Items to the Contract
Select your contract > Add goods and services > Save.
🔒 Contract disclosures are shared across all contracts. If you update a disclosure on the Goods & Services page, the change applies to every contract in the case.
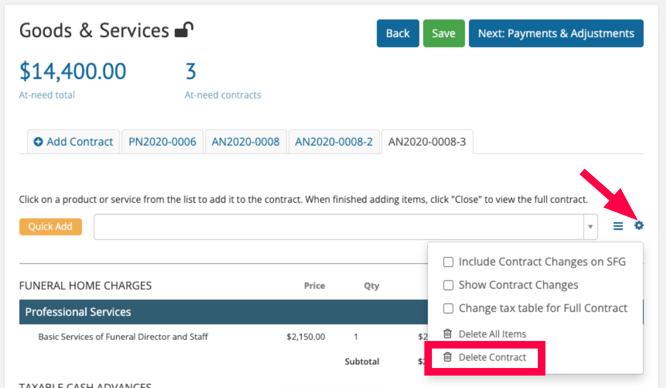
Delete an unsigned contract
Note: Contract numbers are not reused; new contracts will use the next available number
Contracts can also only be deleted if they are still unsigned.
- Go to Goods & Services > Select the unsigned contract you want to remove.
- Click the gear icon on the contract tab > Select Delete Contract.
- Confirm the deletion.
🔒 There are separate permissions for deleting at-need contracts vs. preneed contracts. Check with your administrator if you don't see the delete option.
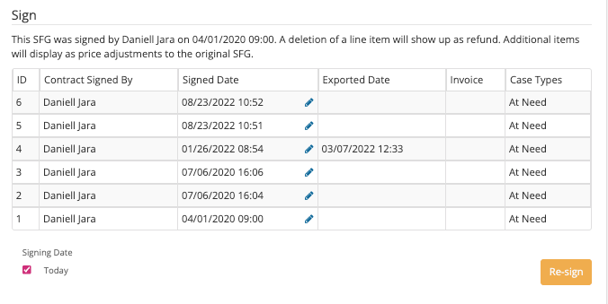
Sign a contract
Each at-need contract is signed separately.
- Go to Goods & Services > Select the contract you want to sign.
- Complete all required fields for that contract > Click Sign and finish the signing process.
You can also use print-and-sign or e-signature options for each contract individually.
Note: Required signing fields are tracked per contract, not per case.
✍️ The fields required to sign are scoped to each contract. You must fill in the required fields for each contract individually before signing.
Switch between contracts
You can switch contracts in either of these ways:
- Use the contract tabs or selector at the top of Goods & Services or Payments & Adjustments
- Use the sidebar to navigate directly to a contract

Payments & Adjustments
Assign Purchasers
Purchasers can be assigned in one of two ways: from the Payments & Adjustments page or from the Friends & Family page.
Assigning purchasers from the Payments & Adjustments page is preferred.
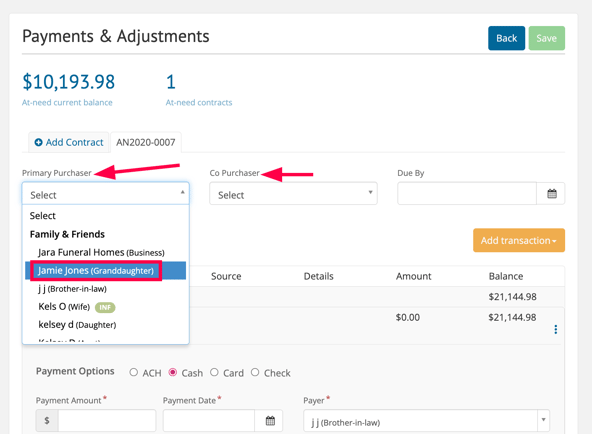
Preferred method: Assign purchasers from the Payments & Adjustments page
Navigate to the Payments & Adjustments page > Add transaction
Open the Primary purchaser drop-down menu > select from the list (or add from this page).
-
Co-purchasers can also be assigned from this page (if needed).
Complete remaining payment details > and Save.
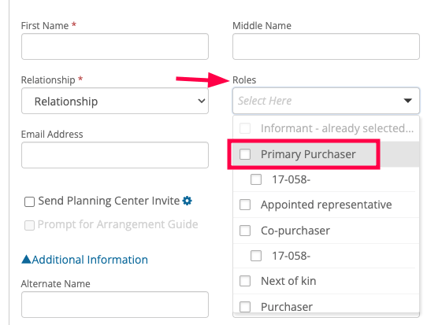
Secondary method: Assign purchasers from the Friends & Family page
Under Family & Friends > Roles > Select the contract > select Primary Purchaser and Co-Purchaser from the dropdowns to assign family or friends.
And Save.
Manage payments
-
Go to Payments & Adjustments > then select the contract tab you want to manage.
-
Add payments or adjustments as needed.
Each contract has its own balance, payment schedule, and transaction history.
Documents
Download forms
- Navigate to the Standard Forms section > Select the form > select your contract > Download.
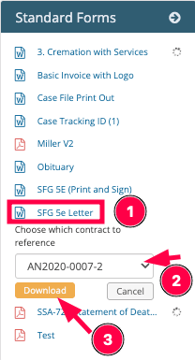
Only financial documents will allow you to choose your contract.
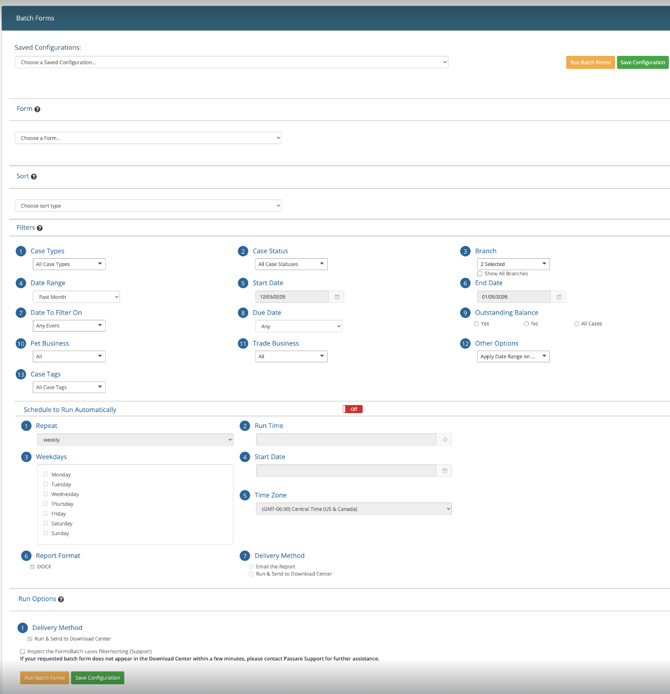
Batch forms
Navigate to Batch Form
Apply your filters
-
Select your Date To Filter On
-
Enter your date range > any other criteria (like Branch or Case Status).
Choose Your Output Type
-
Duplicate form for each case: This will create a separate page/file for every individual contract found.
-
One form for all cases: This will group the data from all matching contracts into one
document.
Click Generate to create your forms.
Financials features
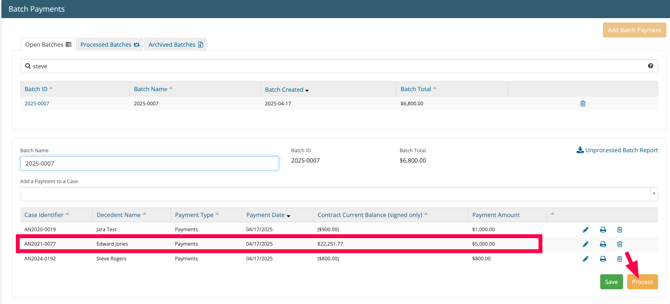
Batch payments
When processing batch payments, each contract appears as a separate selectable row.
- Go to Batch Payments > Search for the case.
- You'll see separate rows for each contract, identified by the Case ID plus the contract number.
- Select the contract(s) you want to apply payments to > Enter payment details > process the batch.
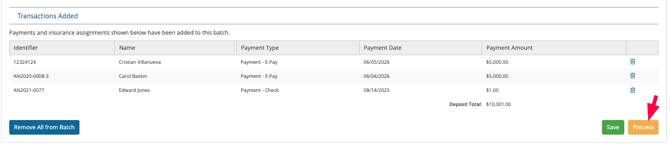
Batch Deposits
When processing batch deposits, each row is a payment.
- Go to Batch deposit > Search for the case.
- You'll see separate rows for each payment, identified by the Case ID plus the contract number.
- Select the payment(s) you want to add to the batch > Enter deposit details > Save changes, and > Process the batch.
Create checks for a contract
When creating checks, you can select items from specific contracts.
- Go to the Checks page > Click to create a new check.
- Search for your case > select items you want to include on the check > Add to check
- Complete the check > Save

The search results will display all items across all contracts, sorted by contract number.
The check will be scoped to the contract(s) the selected items belong to.
Apply interest by contract
Interest transactions are applied per contract.
- Go to the Interest page
- Select the contract you want to apply interest to > Apply interest transaction
The interest transaction will appear on that contract's Payments & Adjustments page.

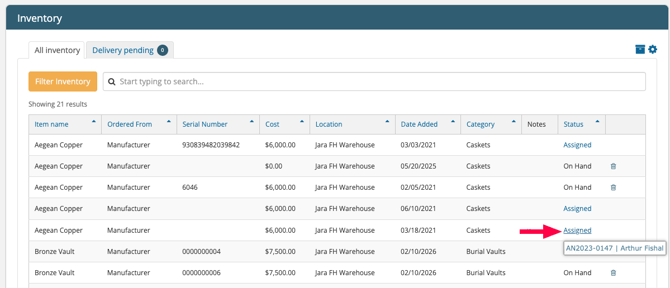
Track inventory by contract
Inventory items now show which contract they are assigned to.
- Go to the Inventory page > When an item is assigned to a case, hover over the Assigned indicator
- The tooltip will display the Case ID and the contract number.
- Click the assignment to navigate directly to that case and contract.
Planning center & mobile
Currently, Planning Center and Mobile only display the first at-need contract.
To accept payments for other contracts digitally, use the payment links feature (see Send payment links below). Each contract's unique payment link allows online payments for that specific contract.
Send payment links in planning center
Each contract has its own unique payment link for online payments.
- Go to the Payments & Adjustments page > Select the contract you want to generate a link for.
- Copy the payment link for that contract > Send the link to the payer.

The payment link will only allow a payment for that specific contract.
🔒 The Hide Balance setting currently applies to all contracts. If you toggle Hide Balance on, it will hide the balance on every contract's payment link.
Need help? Email us at support@passare.com or call (800) 692-5111.