
Create an at-need case
Once you log in to Passare, select the Add icon at the top of your screen.
Then select Case > At-need.

This will open the case creation modal.
Enter details like decedent first name, last name, and first call information.

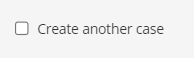
To create multiple cases at once, use the checkbox labeled Create another case.
As long as this is checked, you will be able to create cases back-to-back.
Click Create to add the case. You will be taken to the Vitals page where you can add more details.

While the First and Last Name are the only required fields, we recommend entering as much information as possible, such as:
✔️ Gender
✔️ Date of Birth
✔️ Social Security Number
✔️ Date of Death
This information will be used to auto-populate forms, reports, in website integrations, and more.
Once you add all of the information, be sure to Save.
After saving, use the Next button or select another page to continue filling out case details.
Commonly used pages for case entry are under the Decedent, Arrangement, and Financials sections.

Need more information?
The system will guide you through various pages when creating the case. For detailed information on how to fill out each page, review the resources below:
Need help? Email us at support@passare.com or call 1-800-692-5111.