
Jump ahead to
- Send invites from Family & Friends page
- Send invites from Vitals page
- Send invites from Planning Center page
- Customize invites
Send invites from Family & Friends page
Within a case, select Family & Friends under Decedent. 
Add the person's details like name, relationship, and contact information.
Check the box for Send Planning Center invite and select their Planning Center role.
Click Save Family/Friend.
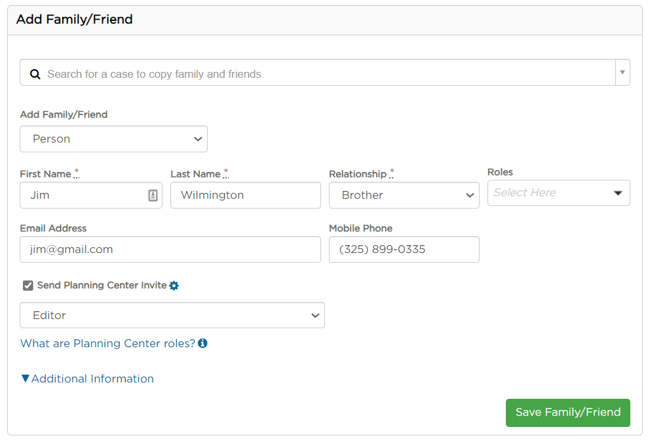
For details on Planning Center roles, click the information icon to see a breakdown of access.
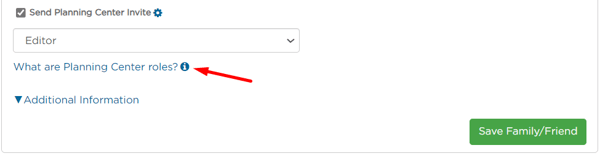
After saving, the family member will receive a Planning Center invite one of the following ways:
- It will be sent via email if you entered their email only.
- It will be sent via text if you entered their cell phone number only.
- It will be sent via email and text if you entered both.
Edit Family/Friend
If you added a family member but didn't invite them to the Planning Center, you can invite them by selecting their name on the Family & Friends page.
Make sure to have their email address and/or mobile phone.
Scroll down to check the box for Send Planning Center invite and select the Planning Center role.
Click Save.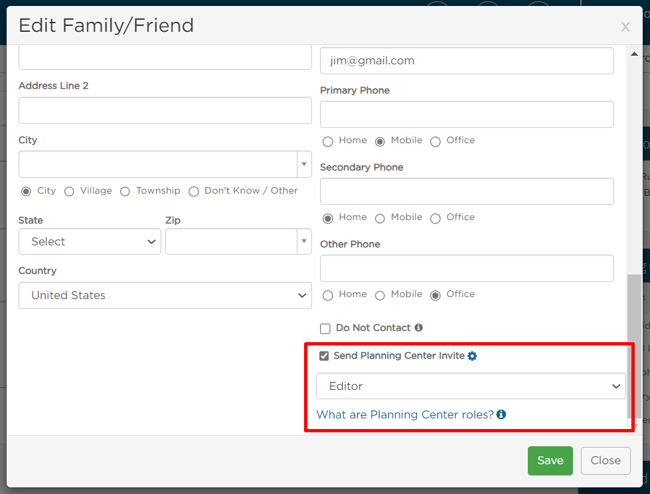
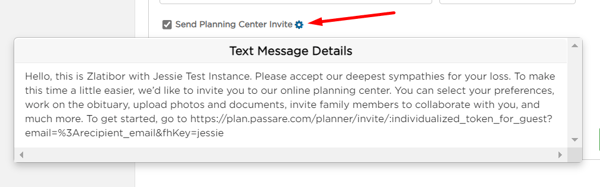
If needed, you can preview the email or text message you are about to send by clicking the gear icon next to Send Planning Center invite.
Send invites from the Vitals page
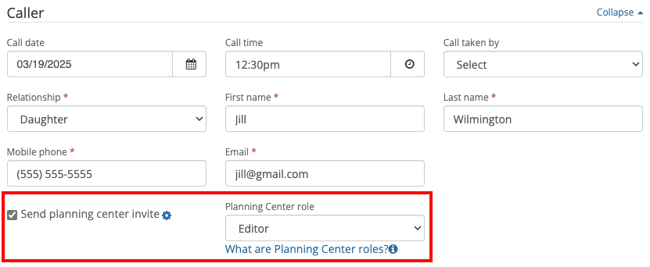
To invite the family from the Vitals page, scroll down to Caller.
Add the person's details like name, relationship, and contact information.
Check the box for Send Planning Center invite and select their Planning Center role, and save.
Send invites from the Planning Center page
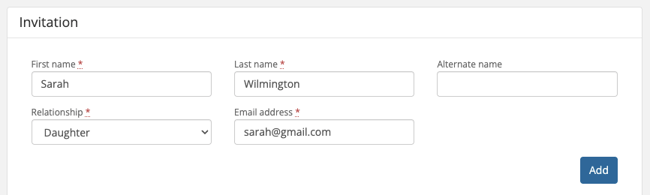
On the Planning Center page, go to the Invitation section.
To add a recipient, enter their name, relationship, and contact information.
Click Add.
From here, you can check which family member(s) you'd like to send an email invite to, then click Send Planning Center invite.
You can also view the invitation status from this page.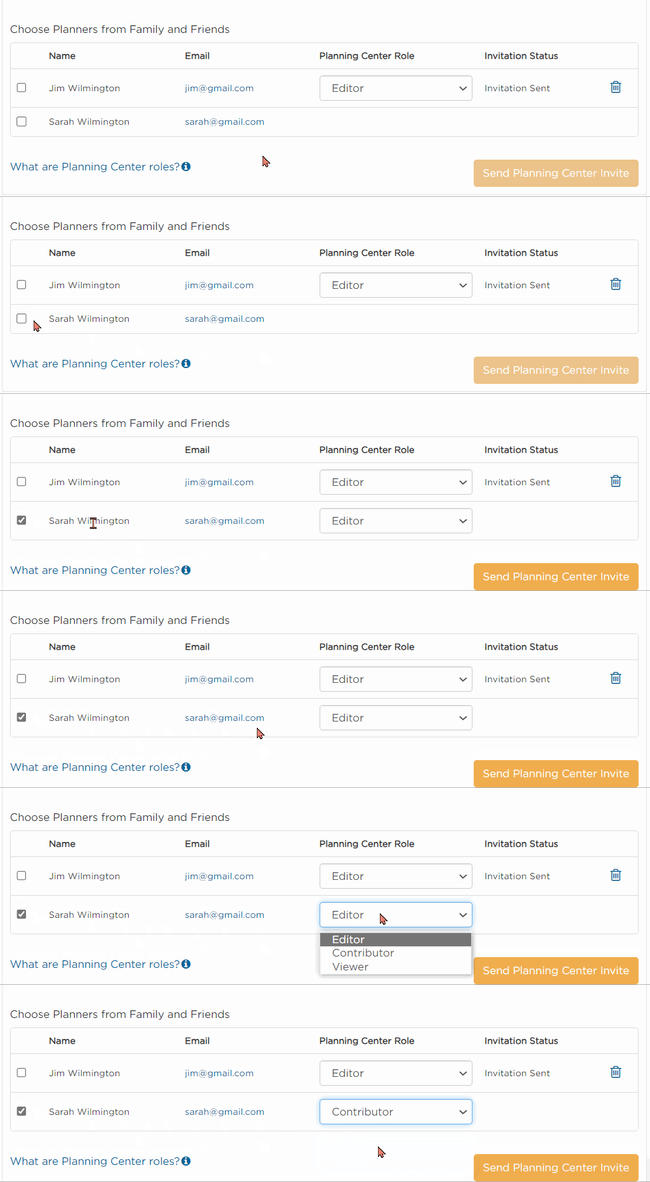
Customize invites
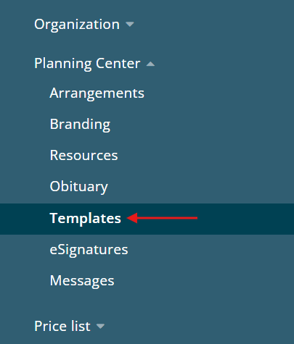
You can customize your text or email invites from Admin > Planning Center > Templates.

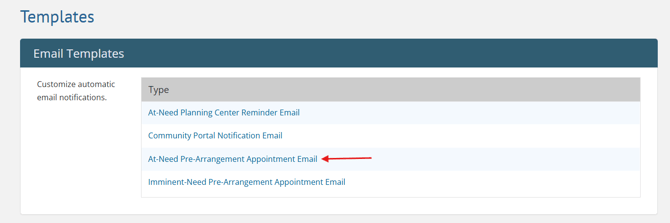
Email templates
Click into the template you'd like to edit.
First, specify who should receive email replies. You can type a user's name or email, or use the branch email.
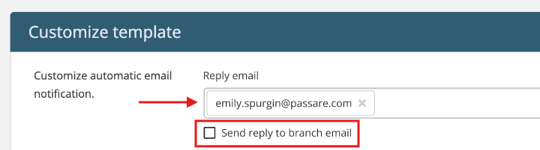
If there is no branch email listed under Organization > Branches, it will be sent to the organization's email on file.
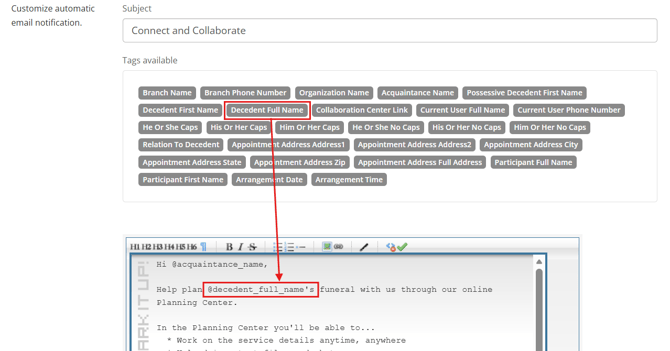
Update the email's subject line from the Subject field and type in the textbox to edit the email's verbiage.
For case-specific information, select a tag so Passare can populate the right details. Tags will be added wherever your cursor is.
Once your template is done, remember to save!
Text templates
From Planning Center > Templates, click into the text message template.
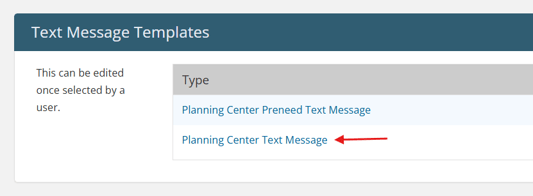
Planning Center Text Message is used for imminent and at-need cases; Planning Center Preneed Text Message is used for preneed cases.
Type in the textbox to edit the email's verbiage.
For case-specific information, select a tag so Passare can populate the right details. Tags will be added wherever your cursor is.
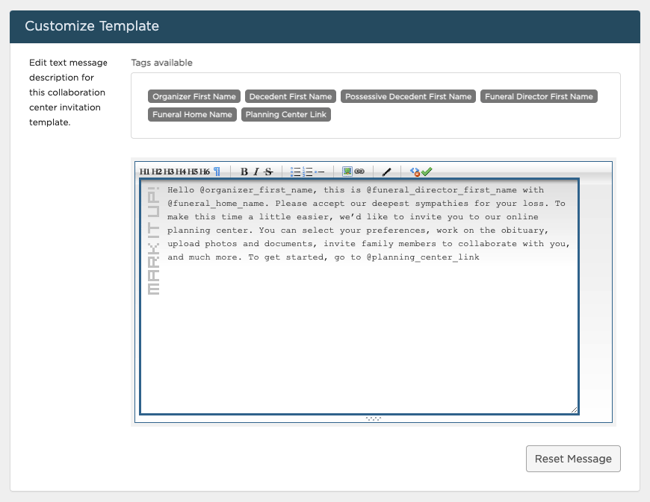
Learn more about using tags.
Once your template is done, remember to save!
Automatic text messages
Automatic text messages default the Planning Center invite button on for specific Family/Friend roles.
For example: If you always want informants to receive a Planning Center invite, this setting will automatically be checked for the selected informant.

To set this up, scroll down to Settings.
Select which roles you want to automatically receive text messages for each branch.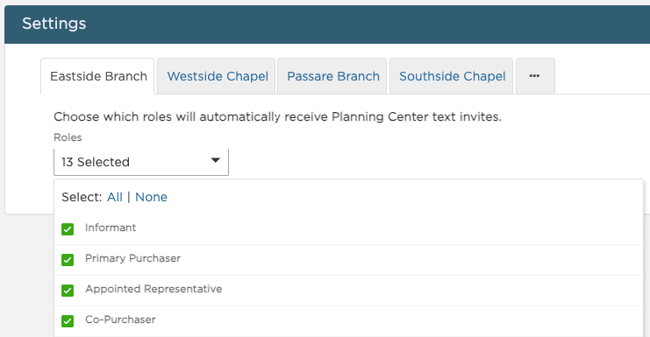
Click Save.
Now the Planning Center invite option will be checked automatically for entries set in the branch and role you configured in settings.
Need more information?
- Getting started with the Planning Center
- Collaborate on the obituary
- Manage Planning Center notifications
Need help? Email us at support@passare.com or call (800) 692-5111.