
✋ Decedent Tracking requires some setup. Want this feature turned on? Email us at support@passare.com or call 1-800-692-5111.
Jump ahead to
Download the app
Once the feature is turned on, visit the Apple Store or Google Play Store. Search for Passare and download the app.
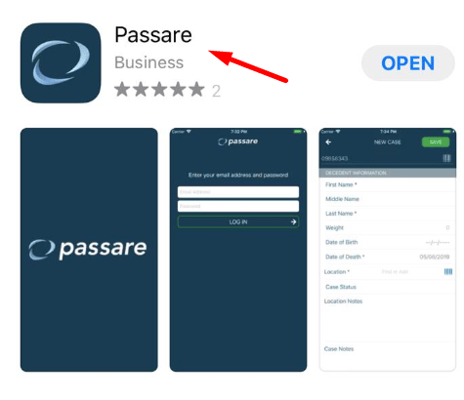
Once downloaded, log in with the same username and password you use for Passare.
Navigating the app
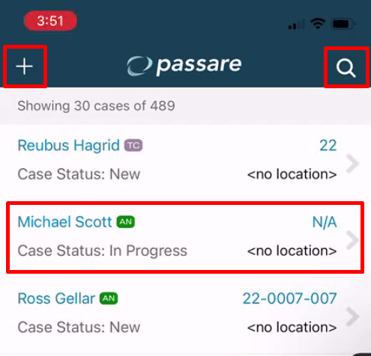
After logging in, you will see your cases listed and a menu bar at the bottom. On the menu bar, there are four icons: magnifying glass, barcode, location pin, and ellipsis.
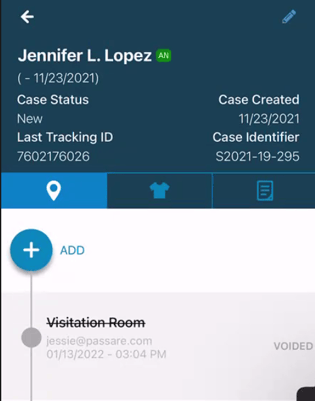
The magnifying glass icon ![]() is your Case Listing. This page shows you all your Passare cases, including the name, case type, case ID, case status, and current location.
is your Case Listing. This page shows you all your Passare cases, including the name, case type, case ID, case status, and current location.
✏️ To view/edit a case, click on the case name.
➕ To add a case, click the + icon in the top-left corner.
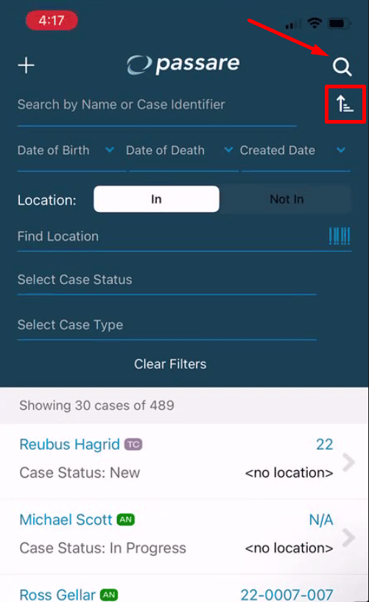
🔍 To sort & filter your cases, select the white magnifying glass icon in the top-right corner. Clicking this will expand filter and sorting options.
When sorting & filtering your cases, you can: search by case name, filter by location, sort using the upward arrow icon, and more.
When you've selected your settings, click the white magnifying glass again to collapse the menu.
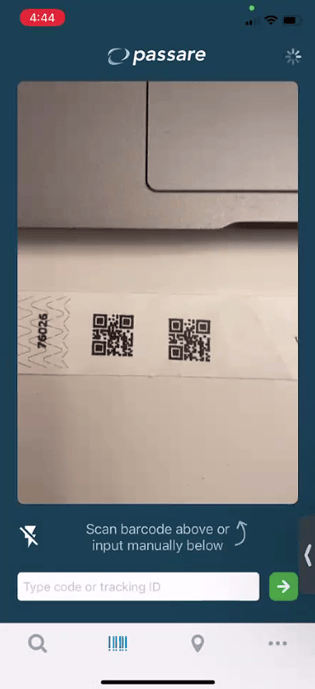
The barcode scanner ![]() lets you quickly access a case by scanning its QR code. Once you are in the case, you can track the body's new locations or items.
lets you quickly access a case by scanning its QR code. Once you are in the case, you can track the body's new locations or items.
The location pin ![]() signifies your Locations page. This is where you add, edit, and delete tracking locations. Locations are necessary for tracking in the app, so don't skip this step!
signifies your Locations page. This is where you add, edit, and delete tracking locations. Locations are necessary for tracking in the app, so don't skip this step!
✏️ To edit a location, click the pencil icon.
➕ To add a new location, select the 'New' button in the top-right corner.
❌ To delete a location, swipe left on the entry and select Delete.
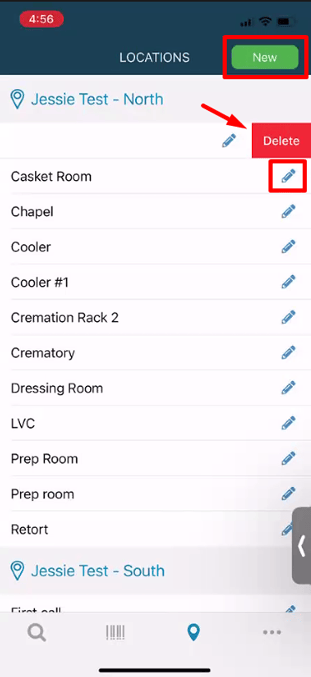
🔒 Heads up! Adding, editing, and deleting locations is a permission. If you need this access enabled, contact Passare Support.
Adding or editing a location will allow you to fill in the location code, branch, and location name.
When you've added in these details, be sure to Save.
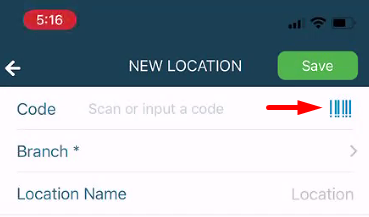
💡 Pro Tip: When you see a barcode icon, click it and quickly scan the code! No need to type it in.
The ellipsis icon ![]() lets you manage login and app settings.
lets you manage login and app settings.
You can toggle between other organizations, log out, and enable shared device settings.
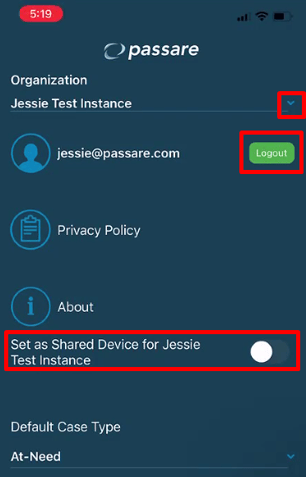
Curious about shared device settings? Keep reading.
Manage shared devices
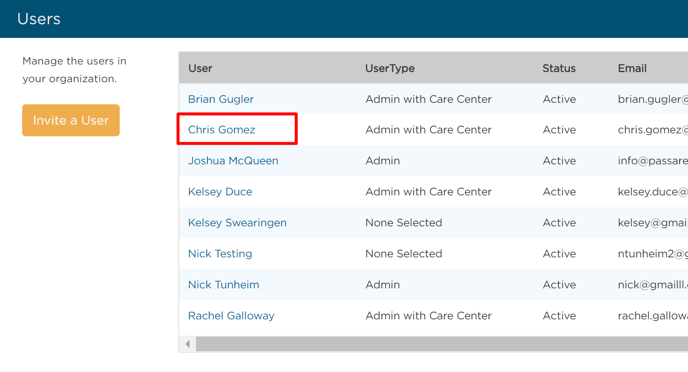
Use a unique PIN so your team can login easily. To find this setting, clear the Admin icon > Users.
🔒 Don't have access? Check your Roles & Permissions settings or contact your Passare Admin to get it turned on.


Select the User.
Under Mobile Settings, check the Uses Shared Device checkbox.
You can then select Auto-Generate PIN, which creates a unique 4-digit Pin for the user. Save.
The unique PIN will be emailed to the user's designated email.

Once a user receives the Pin, they can customize it by going to Admin > My Profile > Mobile Settings.
Choose which organization you'd like to edit and select the Pencil Icon.
Change the pin and select the Check Mark.
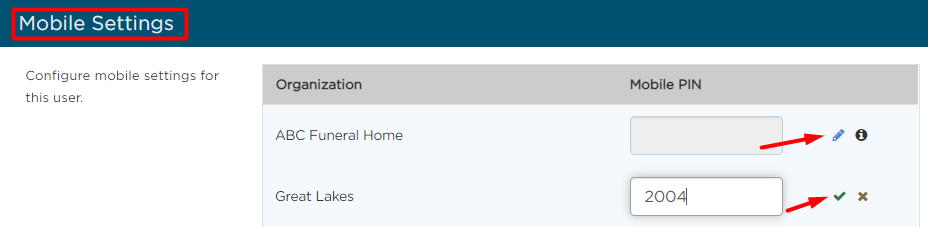
💭 Keep in mind... PINs are organization specific, meaning you cannot have the same pin for all organizations.
Next: create a case in the decedent tracking app.
Commonly asked questions
What information is shared from the mobile app?
Information entered into the Mobile App will be added into Passare. You can find the details in the Care Center under the Tracking page within a case.
Which fields of data will Passare share with the mobile application?
The fields below can be managed from either Passare or the mobile application. Any update that is done from either side will sync up data across both platforms.
- Case Status
- Weight
- Decedent First Name
- Decedent Middle Name
- Decedent Last Name
- Decedent Date of Birth
- Decedent Date of Death
How will I know which cases originated from the mobile application?
In Passare, cases that originated from the mobile application will be assigned a "Case Origin" of "Mobile."
Where will my mobile application's locations be managed?
Users with the ability to manage locations will be able to continue managing those locations within the mobile application. Locations within the mobile application cannot currently be managed within the main Passare application.
How do I add a case identifier to a case within the mobile application?
Case identifiers can only be managed within Passare. If a user creates a case within the mobile application and hits SAVE, that case will assume the next case identifier available from the case identifier templates that are set up within your Passare instance.
Need more information?
- Add locations in the decedent tracking app
- Create a case in the decedent tracking app
- Track locations and items in the decedent tracking app
Need Help? Email us at support@passare.com or call 1-800-692-5111!