
This feature is currently in a private beta. We'll let you know when it goes live!
Jump ahead
Add Selections
Build out your Selections catalog to help families view and select merchandise.
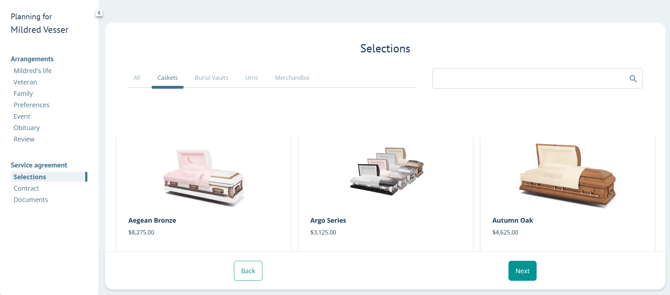
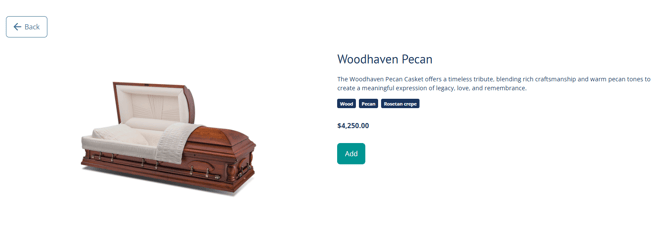
Selections can show the item's image, price, description, and material.
Set up Selections
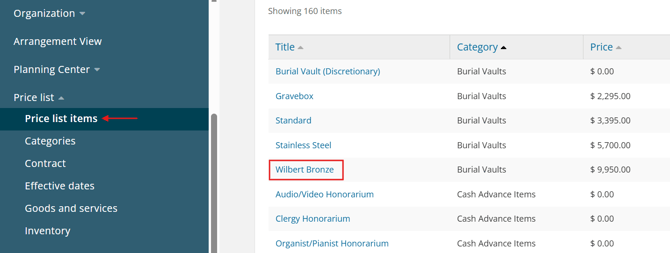
Go to Settings > Price list > Price list items and select an item.
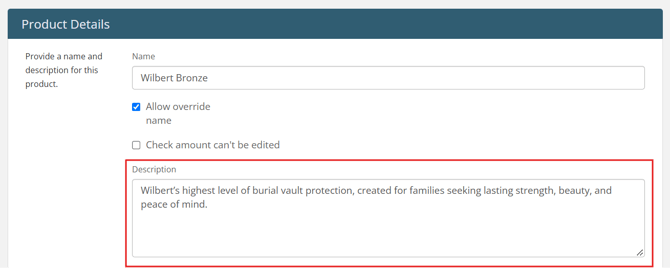
Add an item Description (optional).
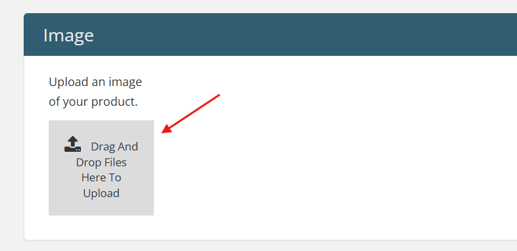
Next, upload an image using drag-and-drop or by browsing your computer.
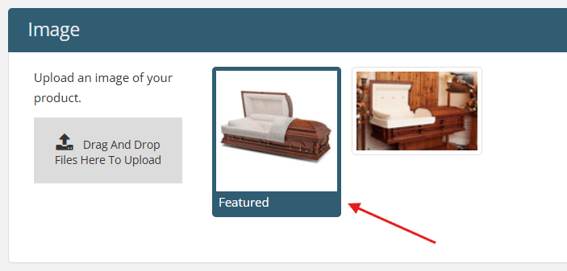
If you upload multiple images, click on the one you'd like to feature.
Featured images are used as the primary photo, and additional photos can be viewed when you click to view the item details.
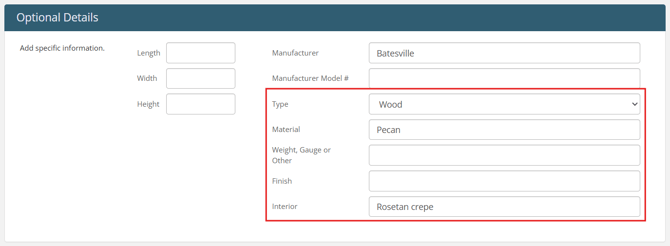
Next, you can add the item's materials and weight (optional).
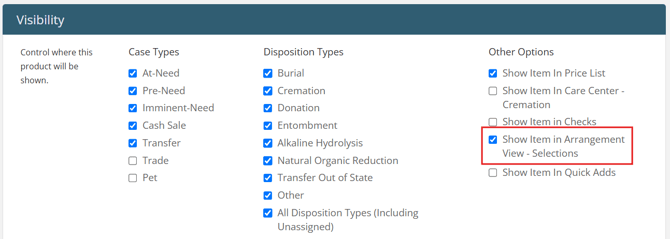
Lastly, scroll to Visibility and select Show item in Arrangement View - Selections.
Continue this process for all items you'd like to feature in Arrangement View Selections.
Images are required for Selections. For items that don't have images (i.e., services), these can be added from the Contract page of Arrangement View and do not require setup.
Select contract
Choose which contract will populate in Arrangement View.
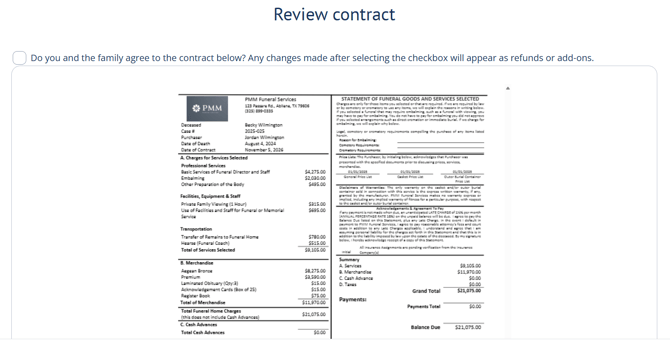
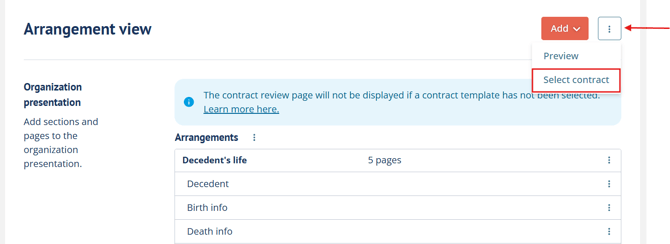
From Settings > Arrangement View, click the top ellipsis and choose Select contract.
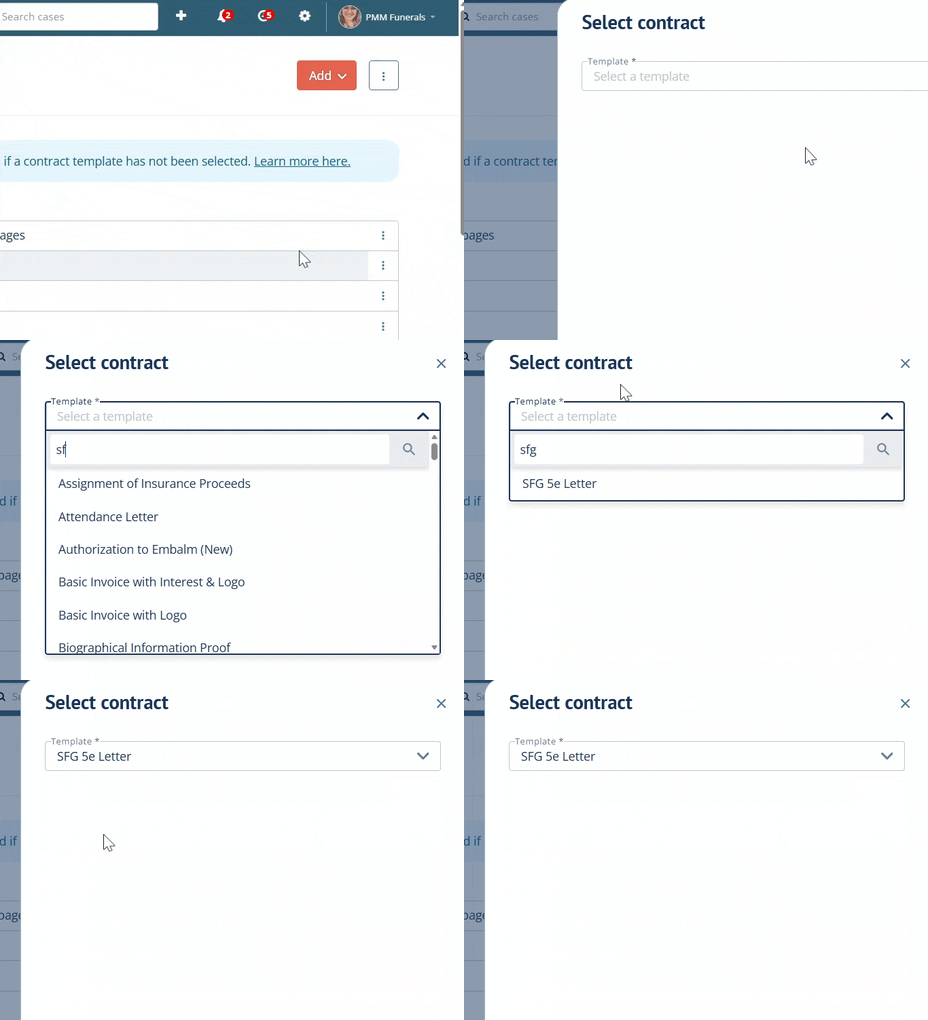
Use the template dropdown to search and select your contract and save.
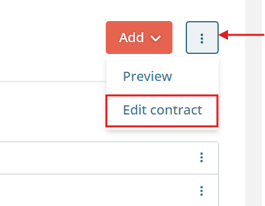
To change the template, go back to the ellipsis and select Edit contract. Repeat the steps above.
Reorder pages
Arrangement View is made up of sections, subsections, and pages.
-
Sections are broad categories that contain subsections, such as Arrangements and Service agreement.
- Sub-sections determine the flow of each section, like Becky's life > Veteran > Family.
- Pages make up each sub-section and house questions and prompts for the family.
For example, Becky's Life will have pages for Birth info, Death info, Employment, etc.
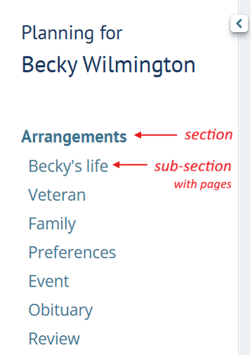
To customize, go to Settings > Arrangement View.
This is how sections, sub-sections, and pages are laid out in the backend.
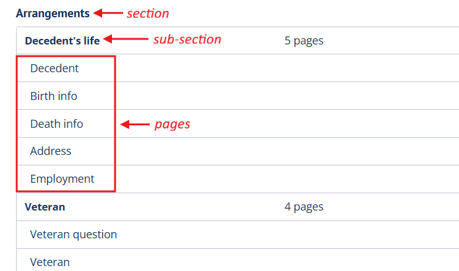
To rearrange, you can drag pages or use the ellipsis.
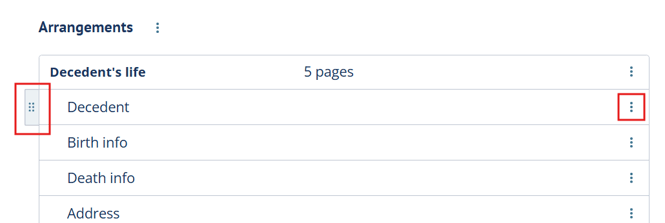
To drag pages, hover over the page and use the drag tool.
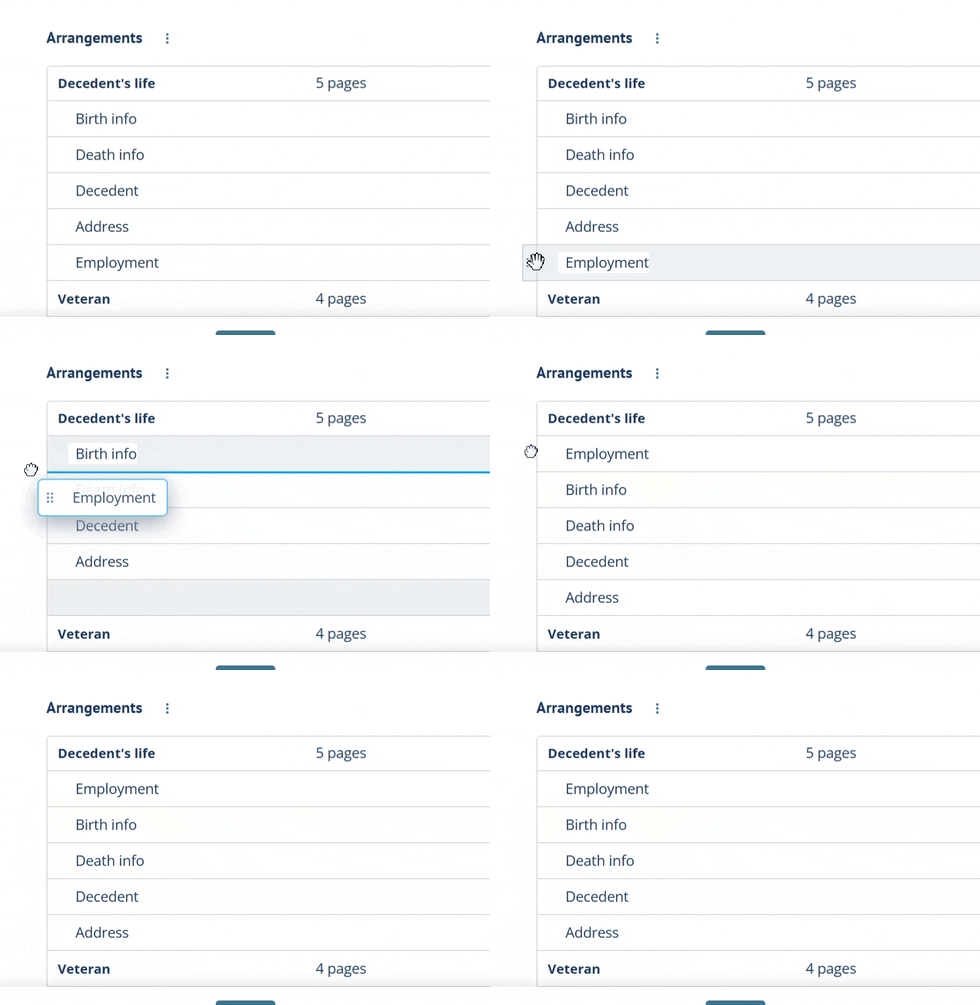
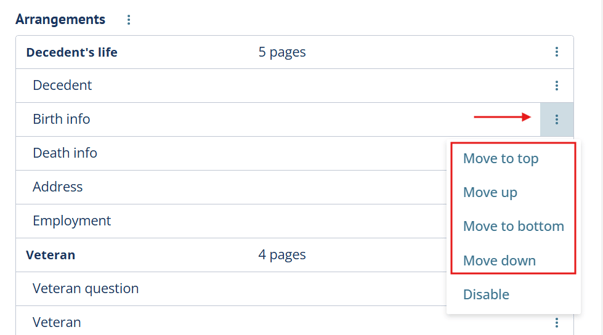
Or, you can click its ellipsis and select where you'd like to move it to:
-
Move to top will jump the page to the top of its subsection
-
Move up will move it up one spot
-
Move to bottom will jump the page to the bottom of its subsection
-
Move down will move it down one spot
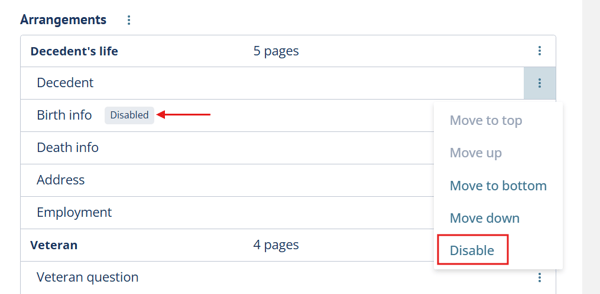
If you disable the page, it will remain in the backend but will be removed from the flow.
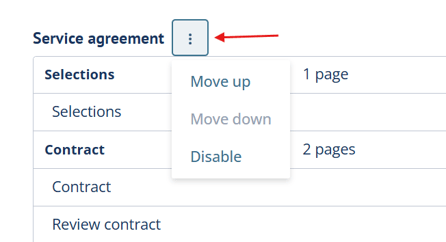
You can also move up, move down, and disable sections and sub-sections.
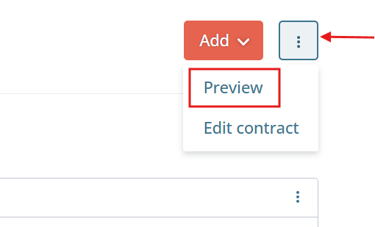
To preview these changes, click the top ellipsis > Preview.
Once you're happy with the changes, Save.

Add new content
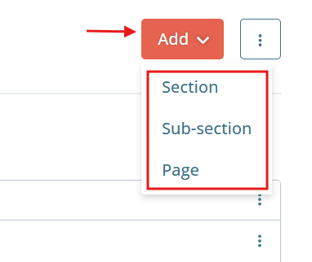
To add your own content to Arrangement View, click Add.
Choose whether you're creating a section, sub-section, or page.
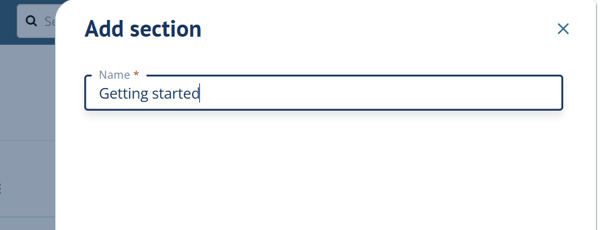
Section
To create a section, simply name it and save.
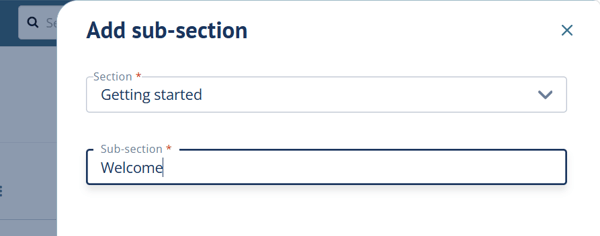
Sub-section
To create a sub-section, assign it a section and name it.
Page
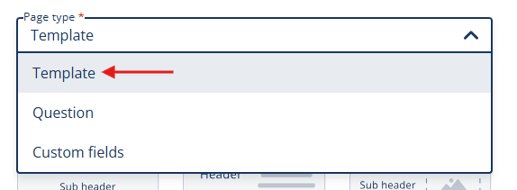
To create a page, assign it a section, sub-section, and select a page type.
-
Template lets you add text, images, and videos using one of our 6 templates
-
Question lets you choose Planning Center questions to include in your flow
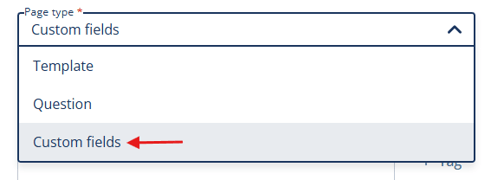
- Custom fields lets you choose Passare custom questions to include in your flow
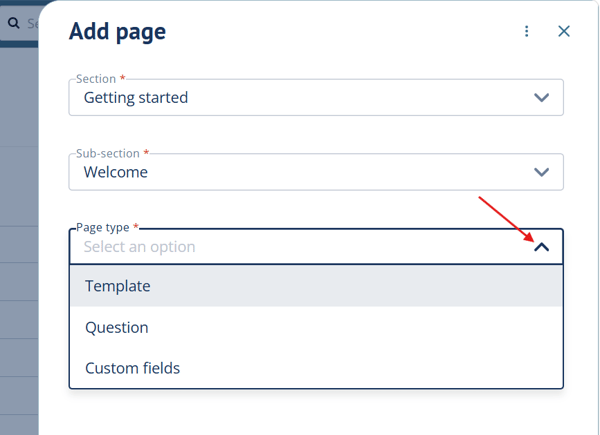
Page type: Template
From the Page type field, select Template.
Then click on the template you'd like to create.
Templates include some combination of a header, sub-header, body text, image, and video.
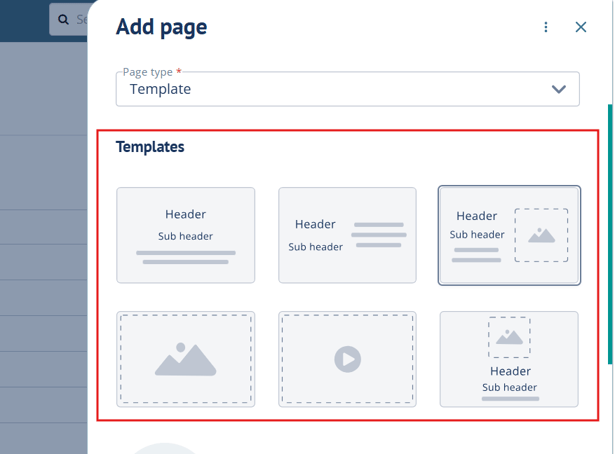
We'll look at two examples: First, we'll use a template with a header, sub-header, body text, and image.
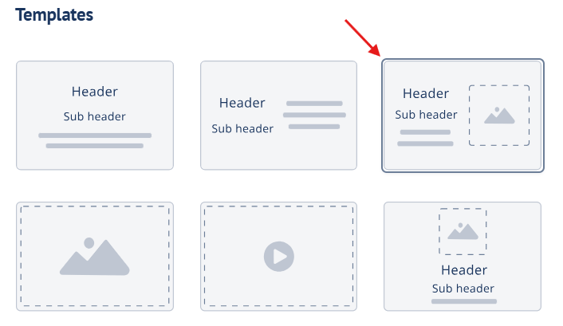
After selecting the template, scroll and fill out the details.
First, click Add to browse and upload a photo. Then name the page.
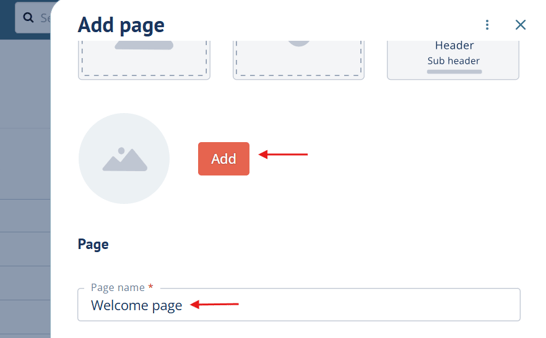
Families won't see the page name; this is only for your reference in the backend.
Add header, sub-header, and body text.
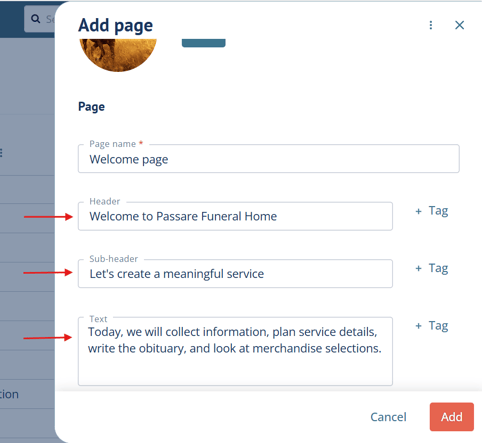
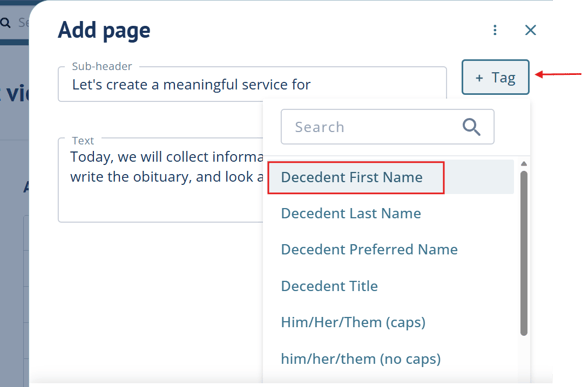
You can further personalize the text with tags. Tags plug in case information, like decedent name and pronouns.
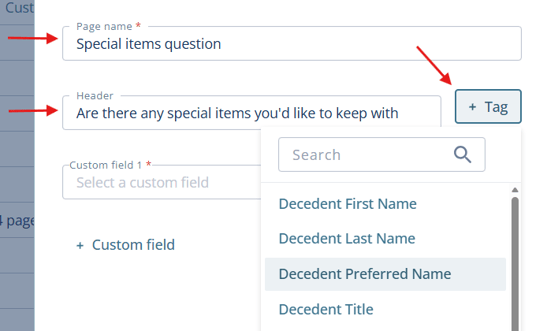
To do this, click + Tag and select the tag you'd like to insert.
The tag will appear in brackets wherever your cursor last clicked in the field.
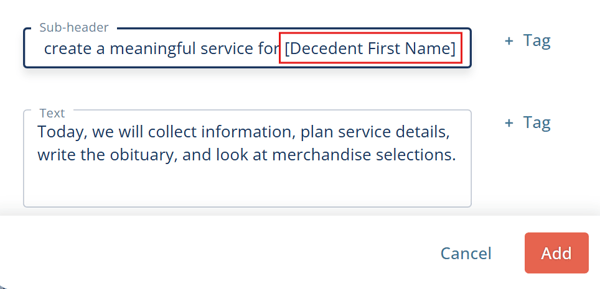
Once everything is filled out, click Add.
Here is an example of the section, sub-section, and page we created:
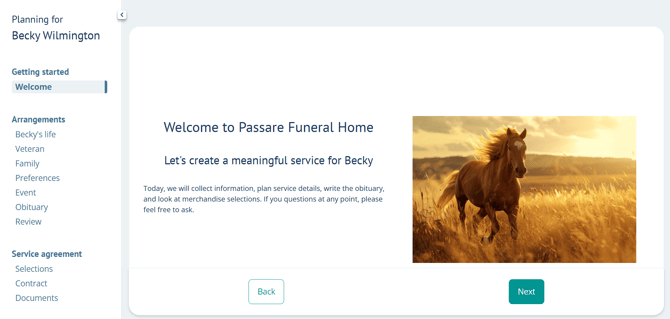
For our second example, we'll create a page with a video.
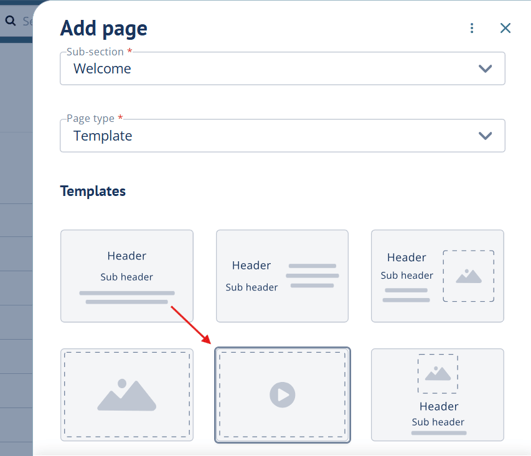
Name the page and paste a Video URL.
You can click the populated link below the field to verify the video you uploaded.
When you're done, click Add.
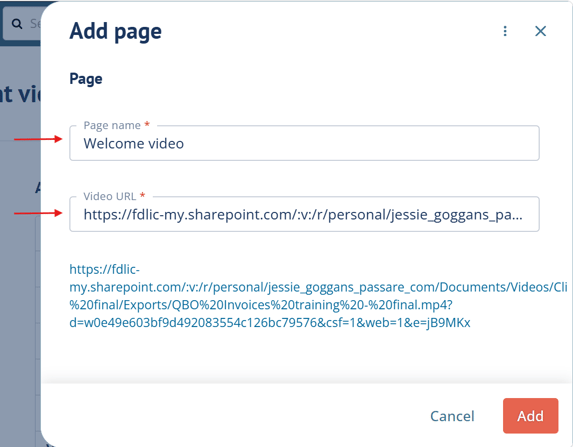
Videos need to be hosted on another platform, like YouTube or Vimeo, then linked here.
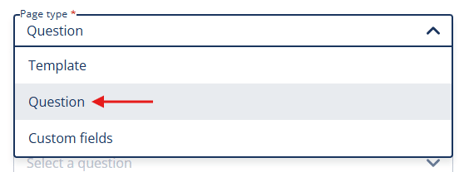
Page type: Question
Under Page type, select Question.
Name the page and use the dropdown to select a Planning Center question.
When you're done, click Add.
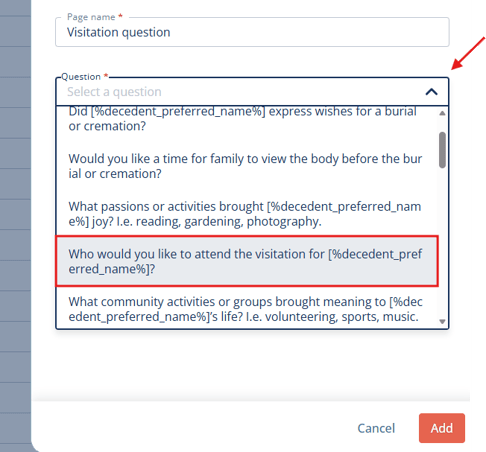
You can only add one Planning Center question per page.
If you have customized your Planning Center questions, these will be available here. Learn more about custom questions in Planning Center.
Page type: Custom fields
Under Page type, select Custom fields
Name the page and add a Header (optional).
You can also use the + Tag function to personalize the header.
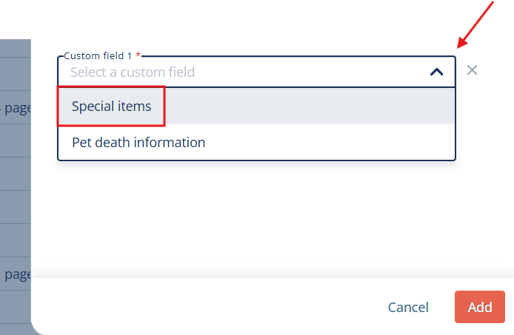
Select a custom field.
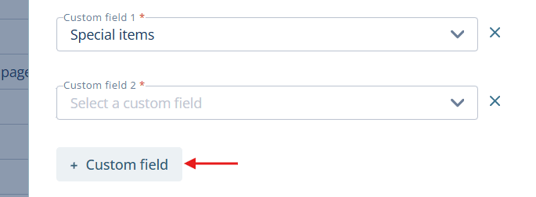
Click + Custom field to add fields. You can have up to 9 custom fields per page.
To delete fields, click the x.
Here's an example of the page with a header:

Learn how to create custom fields in Passare.
Customize by branch
To customize Arrangement View at the branch level, go to Settings > Arrangement View.
Scroll down and click on a branch name.
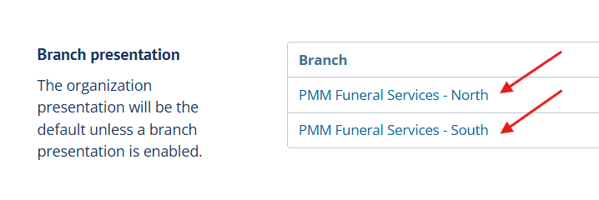
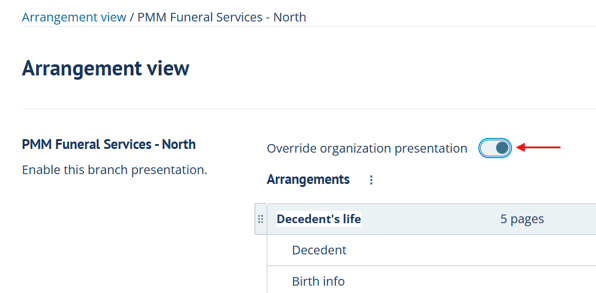
Toggle on the option to Override organization presentation and save.
This will enable page editing and copy over the organization's flow as your starting point.
Follow the instructions earlier in this article to reorder pages and create new ones. Remember to save!
Reset branch customization
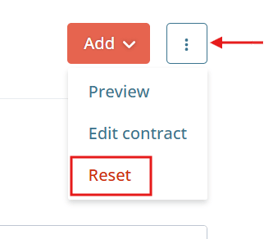
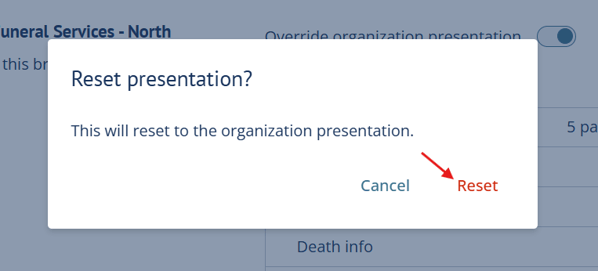
To return to the organization defaults, click the top ellipsis and select Reset.
Then confirm Reset.
Branches that are not customized will continue to use the organization's flow.
Need more information?
Need Help? Email us at support@passare.com or call 1-800-692-5111.