Obituary page
Craft an obituary in Passare, then have families review it in Planning Center or sync to your website.
Write an obituary
Under Arrangement, go to Obituary.

There are a few ways to write the obituary in Passare:
- Free type
- Obituary template
- AI Obituary Writer
- Collaborate in Planning Center
Free type
To craft an obituary by hand, simply type into the text field.
Use style options like bold, italics, bullets, and more to customize formatting.
.gif?width=575&height=324&name=chrome-capture-2024-9-15%20(1).gif)
When you're done, click save.
Obituary template
Save time writing with a template. Templates create obituary text and auto-fill case details for you.
To get started, select the template you'd like to use from the Obituary template dropdown.

A message will appear asking if you'd like to add the new template text. This means that selecting a template will not wipe the existing obituary but will only add to the end of it.
Click Yes.

If the case is missing information, your template will show what's missing in brackets [ ].
Either update the case and regenerate the template or manually edit in the text field.
Save.

Learn how to create custom obituary templates.
AI Obituary Writer
Create unique obituaries quickly with the power of AI. To use this tool, click Generate AI Obituary.

In Obituary types, select one or multiple tone(s).
Then add details and include instructions (such as word count, etc.) in the Obituary prompt field.

Once all details are added, click Preview.
Save the obituary to apply to the page or make adjustments to your prompt and regenerate.
Learn more about our AI Obituary Writer.
Collaborate in Planning Center
Get the family involved in writing the obituary! Once family members are invited to the Planning Center, they can use the same templates or free type an obituary.

Active users on the Obituary page of Planning Center or Passare will appear as a Collaborator, and you can see their edits in live time!

Once the obituary is sent to the newspaper, lock the obituary to prevent last-minute edits.
To do this, check the box next to Obituary in the case sidebar and save.

When the family approves the obituary in the Planning Center, it will also lock.

Obituaries will only be locked for the family. Directors can still make edits and unlock the obituary at any time.
Obituary photo
Upload up to two obituary photos by clicking Upload Photo on the left.
You can also Download any photo already uploaded by family or other staff.

Memorial donations
If the family wants to raise donations, record the organization(s) in Memorial donations.
Choose an organization from the dropdown or use the plus icon to create a new one. Once the charity is selected, click Add.

Pro tip: You can auto-populate memorial donations in the obituary or pull it on a report!
Email obituary
You can send the obituary to any business listed in your Contacts.
Once the obituary is finalized, add or select a business from the Email obituary dropdown.
Click Send.

The Obituary and Business email fields must be filled in before you can send the obituary.
Once sent, a history will appear showing the recipient, recipient email, sender name, and timestamp.

You and the recipient will receive an email with the obituary text and photo.
The obituary will be sent from noreply@passare.com, but your contact email address will be listed in the email body.
Sync to your website
With the completed obituary in Passare, now you can sync to your funeral home website.
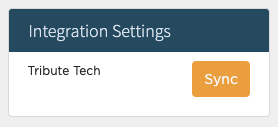
To sync, first lock the obituary and then click sync next to the integration name.

Follow the links below to learn more about each of our website integrations:
Batesville / CFS / Tribute Tech / Funeral Innovations / funeralOne / Gemini Graphics / Outcompete Marketing / MKJ / TukiosNeed more information?
Need help? Email us at support@passare.com or call 1-800-692-5111.
